> ## Documentation Index
> Fetch the complete documentation index at: https://koreai-ai-for-process-dev.mintlify.app/llms.txt
> Use this file to discover all available pages before exploring further.
# Amazon Connect Integration with Agent AI Voice Via AWS Third Party Applications
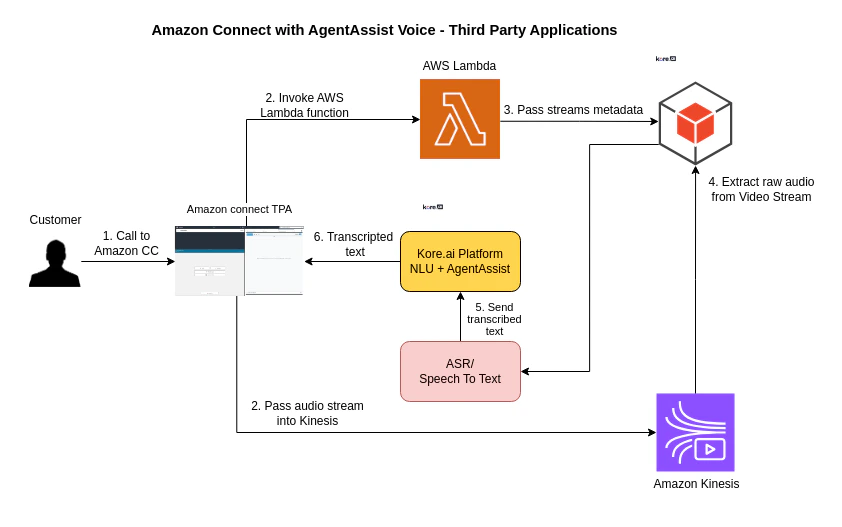
This document describes the integration of Amazon Connect with Kore Agent AI - Voice using AWS third-party applications. This integration enables Amazon Connect to receive voice calls while Agent AI provides real-time support to agents. Audio streams from both the user and agent are captured and processed using Amazon Kinesis Video Streams. AWS Lambda functions manage transcription and token generation. Agent AI is embedded into the Amazon Connect agent workspace to deliver AI-powered assistance such as [Agentic Copilot](./../../configuration/linked-services.md#agentic-configurations), [Next Best Action](./../../agent-experience/agent-assist-widget-v3.md), [Agent Coaching](./../../agent-experience/agent-realtime-coaching.md), [Agent Playbook](./../../agent-experience/playbook.md), [sentiment analysis](./../../agent-experience/agent-assist-widget-v3.md), [EOC Summary](./../../agent-experience/agent-assist-widget-v3.md#assist-tab), and more throughout the conversation.
## High-level architecture
 ## Prerequisites
* Amazon Connect instance with admin privileges.
* Kore Agent AI account.
* Basic know-how of Amazon Connect.
* Ability to receive voice calls on Amazon Connect agent desktop.
* AWS Lambda
* An account associated with the AWS Client ID and Secret with Read permissions to Amazon Kinesis Streams.
* Transcription trigger, a microservice that extracts the required parameters from the request body and generates the KVS Processing executable as a separate process with the parameters (like Contact Details, Credentials, and Voice Gateway).
* The **AgentAssist third-party application** created in Amazon Connect using AWS Third-party Applications.
## Integration Setup Guide
* [Amazon Connect Integration with Agent AI Voice Via AWS Third Party Applications](#amazon-connect-integration-with-agent-ai-voice-via-aws-third-party-applications)
* [High-level architecture](#high-level-architecture)
* [Prerequisites](#prerequisites)
* [Integration Setup Guide](#integration-setup-guide)
* [Kore Agent AI](#kore-agent-ai)
* [AWS Lambda](#aws-lambda)
* [First Function: KVS Trigger (Choose any other name)](#first-function-kvs-trigger-choose-any-other-name)
* [Second Function: IFrame Token Generator (Choose any other name)](#second-function-iframe-token-generator-choose-any-other-name)
* [AWS Connect Third Party Application Configuration](#aws-connect-third-party-application-configuration)
* [Amazon Connect Security Profile Permissions](#amazon-connect-security-profile-permissions)
* [Amazon Connect](#amazon-connect)
* [Configuring Amazon Connect Instance](#configuring-amazon-connect-instance)
* [Configuring Amazon Connect Contact Flow](#configuring-amazon-connect-contact-flow)
* [Attaching Contact Flow to Phone Number](#attaching-contact-flow-to-phone-number)
* [Test Your Integration](#test-your-integration)
* [KVSQueueFlow.json](#kvsqueueflowjson)
### Kore Agent AI
To onboard the Kore Agent AI account and create dialog tasks, refer to [About Agent AI](../../about-agent-ai.md).
Two configurations are needed from Agent AI:
* Web/Mobile Client - JWT App Details
* SIP Trunk Configuration
### AWS Lambda
#### First Function: KVS Trigger (Choose any other name)
This function retrieves call stream metadata and AWS credentials from the environment, generates a credential set (SessionToken, AccessKeyId, SecretAccessKey) for KVS access, and triggers the Transcriber to send transcripts to the Kore AI Agent with the current Conversation ID.
1. Download the Lambda [from here](https://github.com/Koredotcom/korecc-twilio/raw/master/AmazonConnect/lambdas/KVS_Trigger.zip) and upload to the function you create.
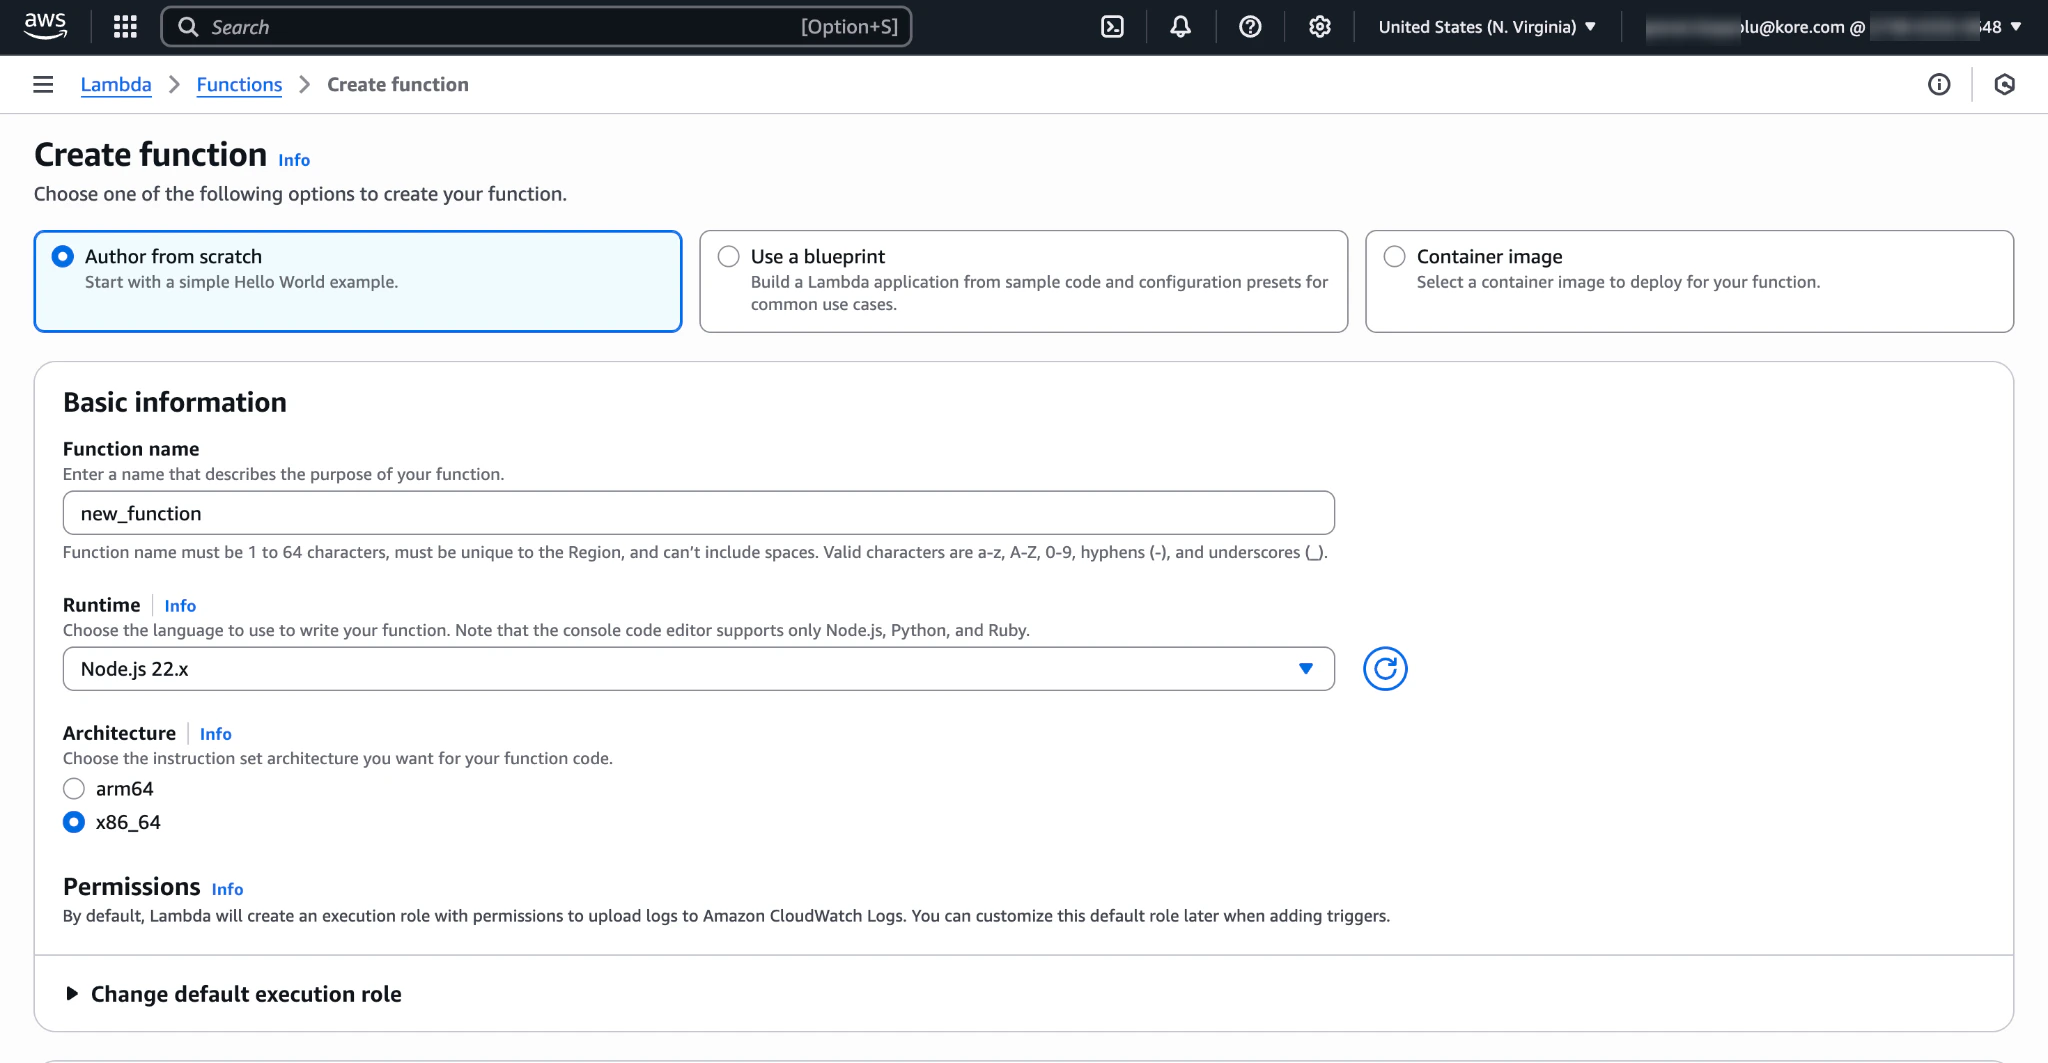
2. Go to **Create function**.
3. Enter a name in the **Function name** field.
## Prerequisites
* Amazon Connect instance with admin privileges.
* Kore Agent AI account.
* Basic know-how of Amazon Connect.
* Ability to receive voice calls on Amazon Connect agent desktop.
* AWS Lambda
* An account associated with the AWS Client ID and Secret with Read permissions to Amazon Kinesis Streams.
* Transcription trigger, a microservice that extracts the required parameters from the request body and generates the KVS Processing executable as a separate process with the parameters (like Contact Details, Credentials, and Voice Gateway).
* The **AgentAssist third-party application** created in Amazon Connect using AWS Third-party Applications.
## Integration Setup Guide
* [Amazon Connect Integration with Agent AI Voice Via AWS Third Party Applications](#amazon-connect-integration-with-agent-ai-voice-via-aws-third-party-applications)
* [High-level architecture](#high-level-architecture)
* [Prerequisites](#prerequisites)
* [Integration Setup Guide](#integration-setup-guide)
* [Kore Agent AI](#kore-agent-ai)
* [AWS Lambda](#aws-lambda)
* [First Function: KVS Trigger (Choose any other name)](#first-function-kvs-trigger-choose-any-other-name)
* [Second Function: IFrame Token Generator (Choose any other name)](#second-function-iframe-token-generator-choose-any-other-name)
* [AWS Connect Third Party Application Configuration](#aws-connect-third-party-application-configuration)
* [Amazon Connect Security Profile Permissions](#amazon-connect-security-profile-permissions)
* [Amazon Connect](#amazon-connect)
* [Configuring Amazon Connect Instance](#configuring-amazon-connect-instance)
* [Configuring Amazon Connect Contact Flow](#configuring-amazon-connect-contact-flow)
* [Attaching Contact Flow to Phone Number](#attaching-contact-flow-to-phone-number)
* [Test Your Integration](#test-your-integration)
* [KVSQueueFlow.json](#kvsqueueflowjson)
### Kore Agent AI
To onboard the Kore Agent AI account and create dialog tasks, refer to [About Agent AI](../../about-agent-ai.md).
Two configurations are needed from Agent AI:
* Web/Mobile Client - JWT App Details
* SIP Trunk Configuration
### AWS Lambda
#### First Function: KVS Trigger (Choose any other name)
This function retrieves call stream metadata and AWS credentials from the environment, generates a credential set (SessionToken, AccessKeyId, SecretAccessKey) for KVS access, and triggers the Transcriber to send transcripts to the Kore AI Agent with the current Conversation ID.
1. Download the Lambda [from here](https://github.com/Koredotcom/korecc-twilio/raw/master/AmazonConnect/lambdas/KVS_Trigger.zip) and upload to the function you create.
2. Go to **Create function**.
3. Enter a name in the **Function name** field.
 4. Go to **Upload from**.
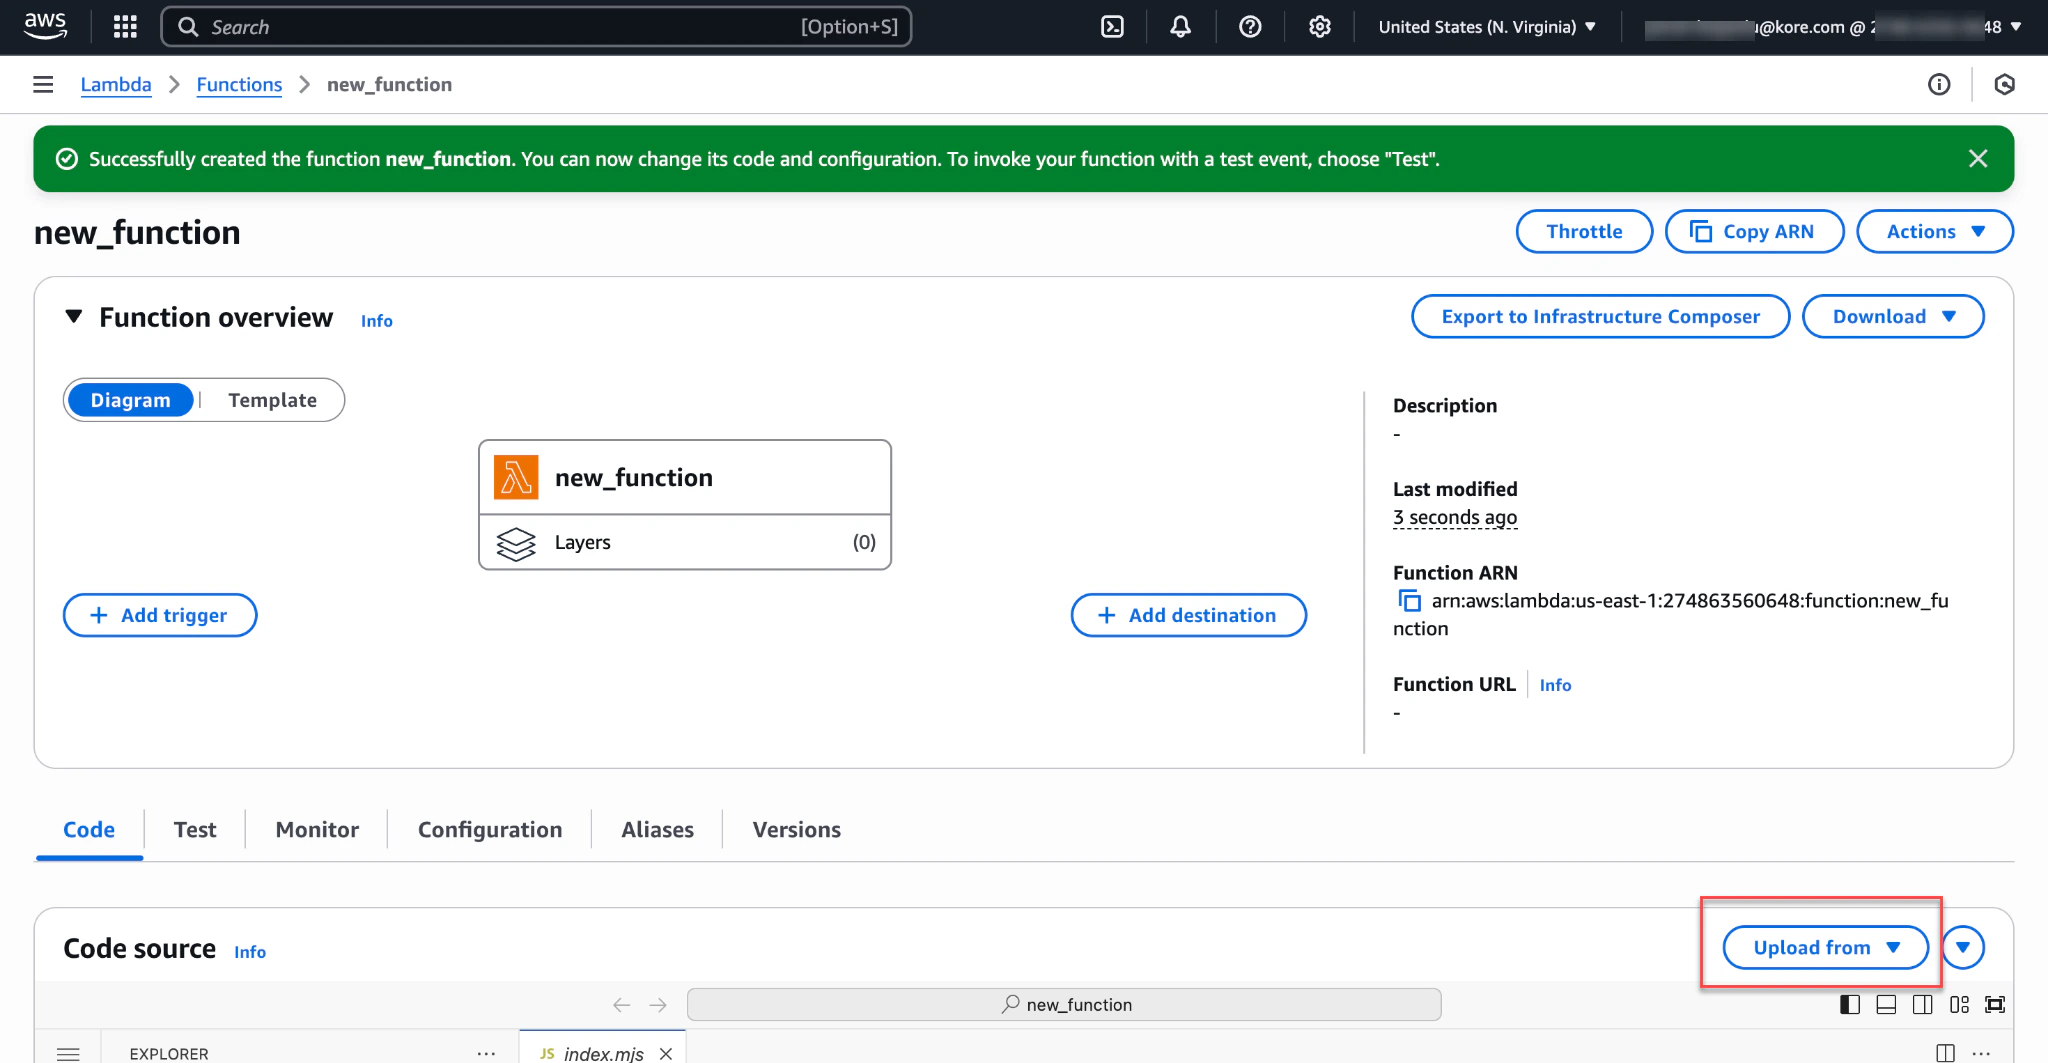 1. Upload the **Lambda** zipped file.
2. Click **Save**.
3. Go to **Runtime settings**.
4. Click **Edit** and change the **Handler** name from **index.handler** to **kvs\_trigger.handler**.
1. Upload the **Lambda** zipped file.
2. Click **Save**.
3. Go to **Runtime settings**.
4. Click **Edit** and change the **Handler** name from **index.handler** to **kvs\_trigger.handler**.
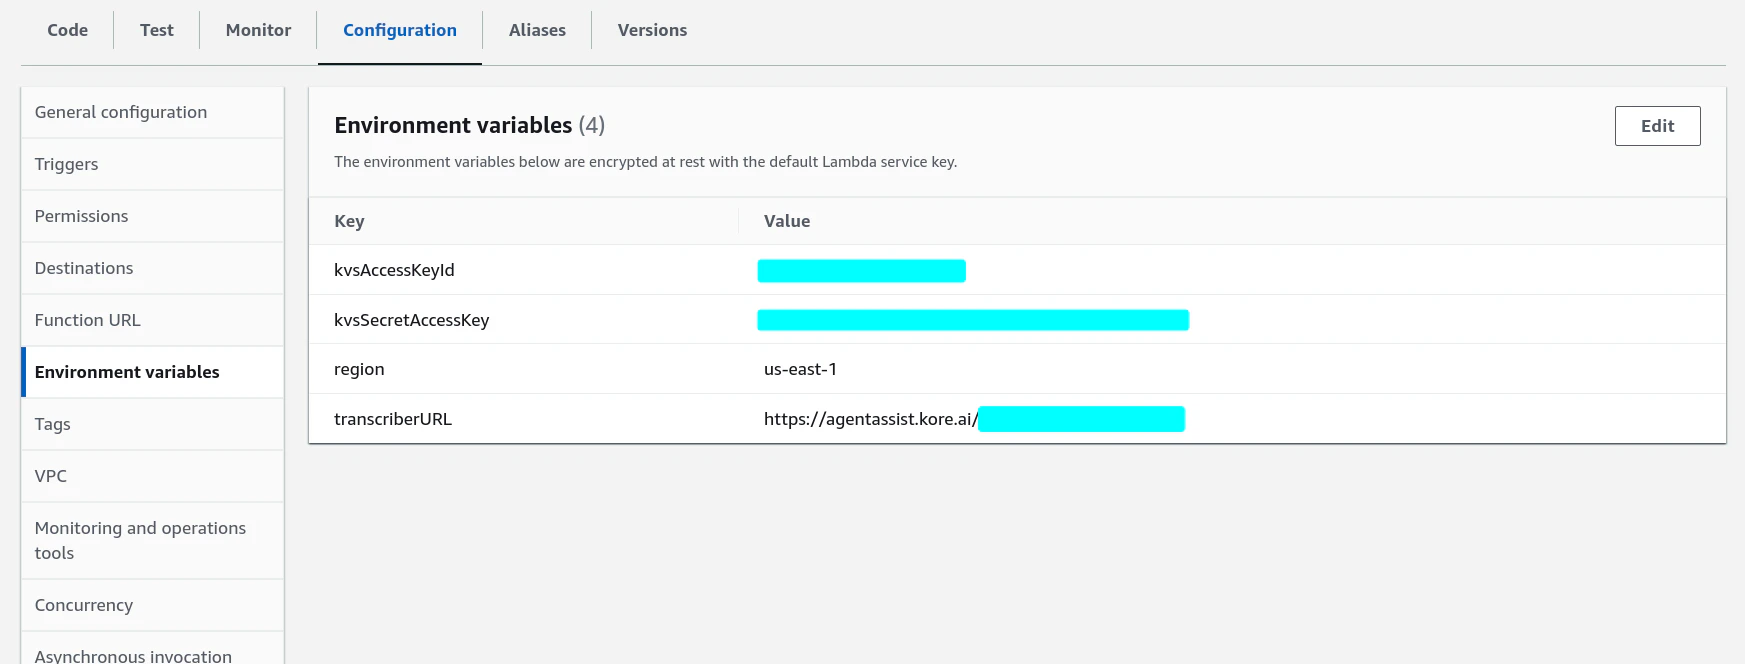
 5. Go to **Configuration** > **Environment variables**.
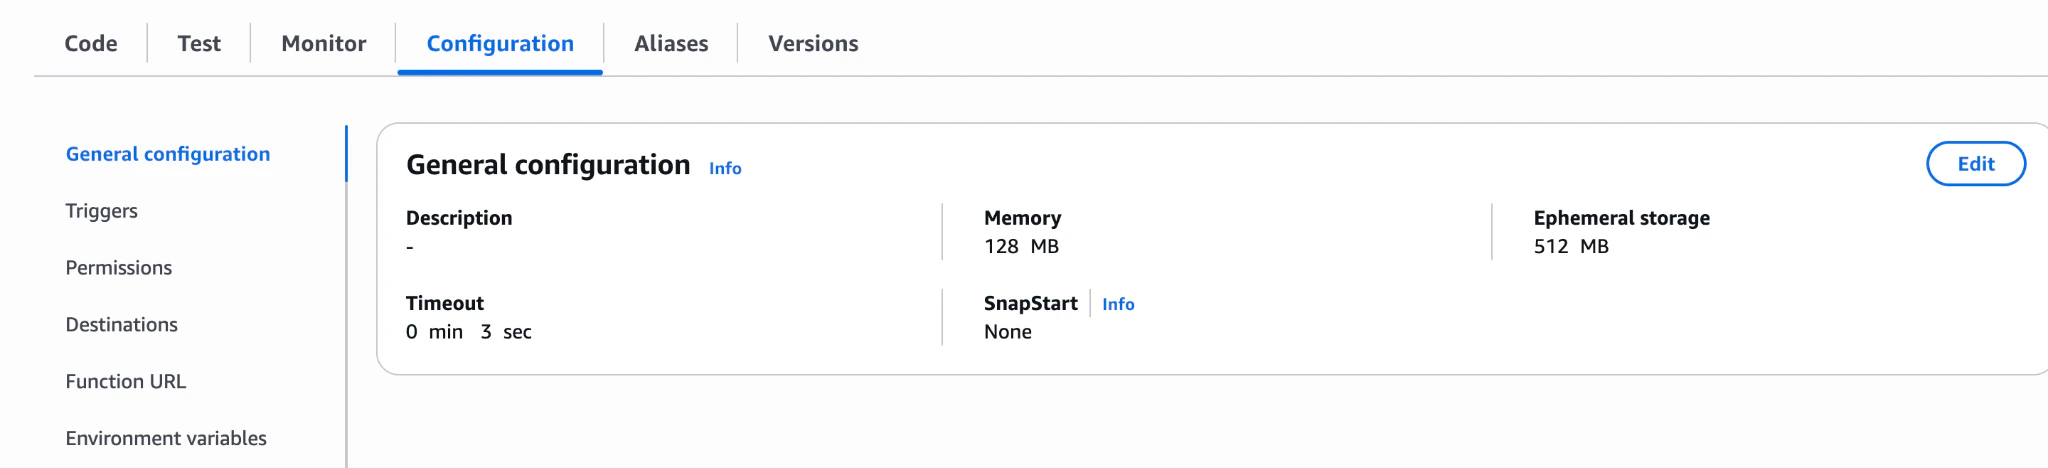 6. Create the following environment variables within the Lambda:
* **kvsAccessKeyId** - AWS Client ID
* **kvsSecretAccessKey** - AWS Client Secret
* **region** - add your AWS Region
* **transcriberURL** - `https://agentassist.kore.ai/integrations/amzn/voice/`
* For regions other than **US-prod**, replace the above domain with your Agent AI domain.
**Steps to get the AWS Client ID and Secret**
1. Ensure the account associated with the AWS Client ID and Secret has Read permissions to Amazon KVS Kinesis Streams.
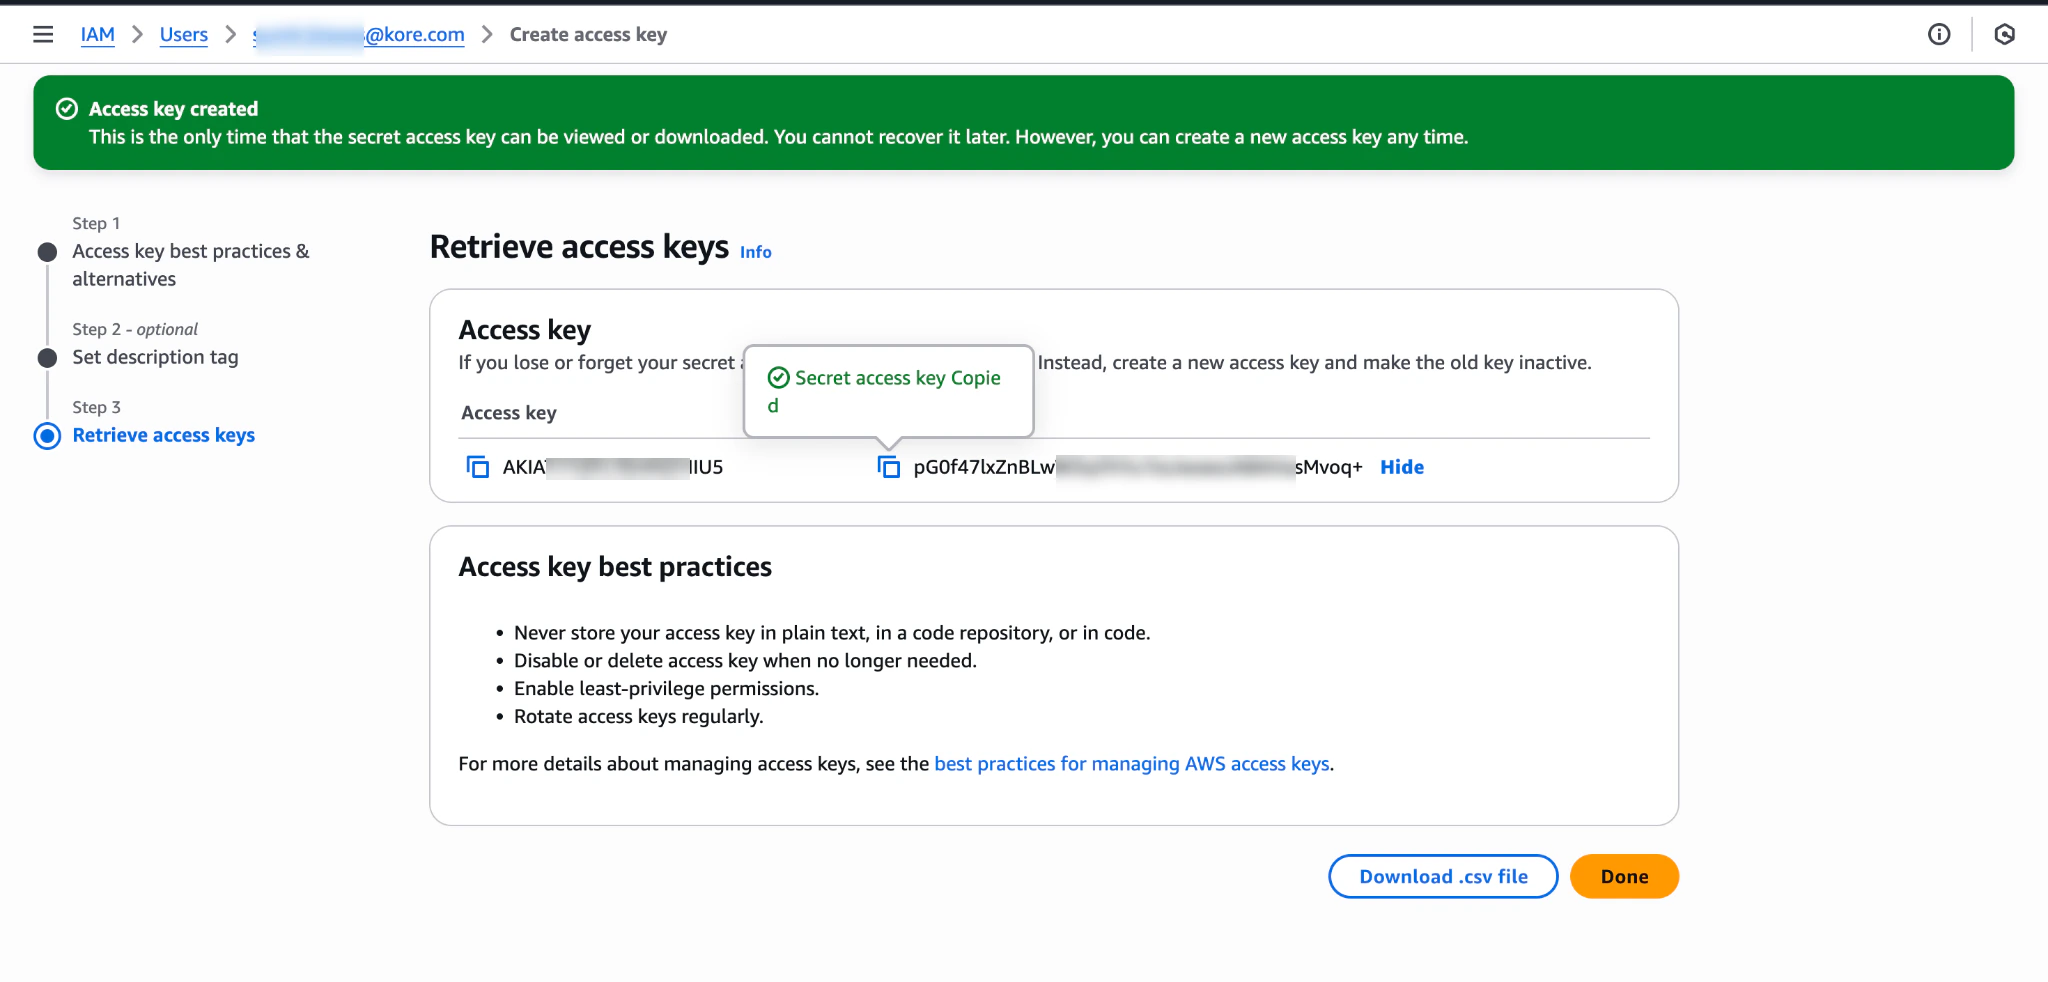
2. Get your AWS Client ID and Secret from IAM:
1. Go to **IAM** > **Users**.
2. Click **Users** > **Security credentials** tab.
3. Click **Create access key**.
4. Select **Use case** as **Application running on an AWS compute service**.
5. Click **next**.
6. Enter a description tag, and then click **create access key**.
6. Create the following environment variables within the Lambda:
* **kvsAccessKeyId** - AWS Client ID
* **kvsSecretAccessKey** - AWS Client Secret
* **region** - add your AWS Region
* **transcriberURL** - `https://agentassist.kore.ai/integrations/amzn/voice/`
* For regions other than **US-prod**, replace the above domain with your Agent AI domain.
**Steps to get the AWS Client ID and Secret**
1. Ensure the account associated with the AWS Client ID and Secret has Read permissions to Amazon KVS Kinesis Streams.
2. Get your AWS Client ID and Secret from IAM:
1. Go to **IAM** > **Users**.
2. Click **Users** > **Security credentials** tab.
3. Click **Create access key**.
4. Select **Use case** as **Application running on an AWS compute service**.
5. Click **next**.
6. Enter a description tag, and then click **create access key**.
 3. The final configuration should appear like the following image:
 #### Second Function: IFrame Token Generator (Choose any other name)
This function generates the Kore Agent AI IFrame widget token to display properly within the Amazon Connect agent workspace. Download the Lambda from [here](https://github.com/Koredotcom/korecc-twilio/raw/master/AmazonConnect/lambdas/Kore.ai_Token_Generator.zip) and upload this function on Lambda.
### AWS Connect Third Party Application Configuration
This includes the Kore Agent AI widget that renders within the Amazon Connect Agent Workspace with the context of the current conversation.
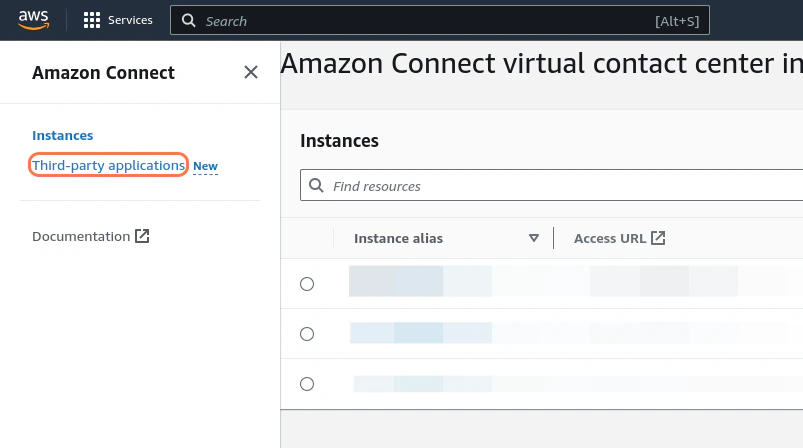
1. Go to **Amazon Connect** > **Third-party applications**.
#### Second Function: IFrame Token Generator (Choose any other name)
This function generates the Kore Agent AI IFrame widget token to display properly within the Amazon Connect agent workspace. Download the Lambda from [here](https://github.com/Koredotcom/korecc-twilio/raw/master/AmazonConnect/lambdas/Kore.ai_Token_Generator.zip) and upload this function on Lambda.
### AWS Connect Third Party Application Configuration
This includes the Kore Agent AI widget that renders within the Amazon Connect Agent Workspace with the context of the current conversation.
1. Go to **Amazon Connect** > **Third-party applications**.
 2. Click **Add application**.
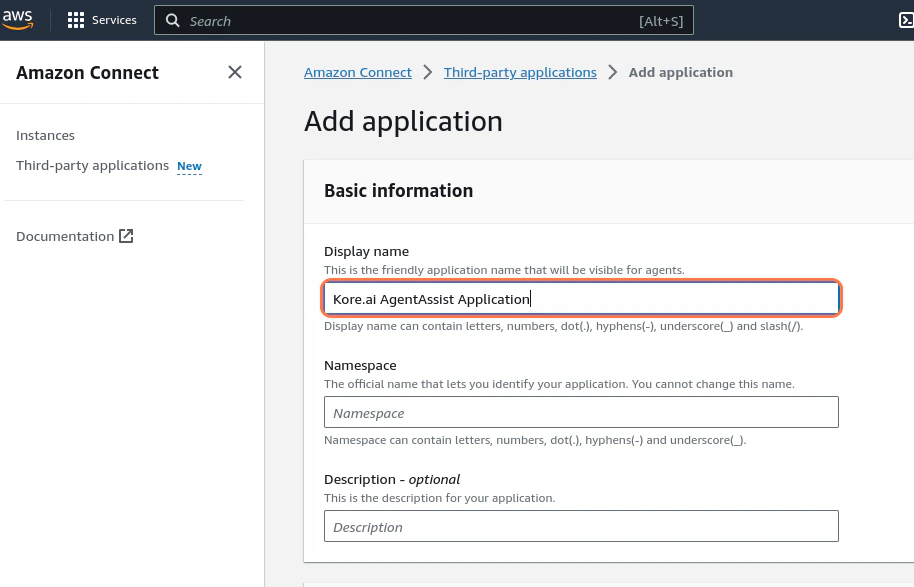
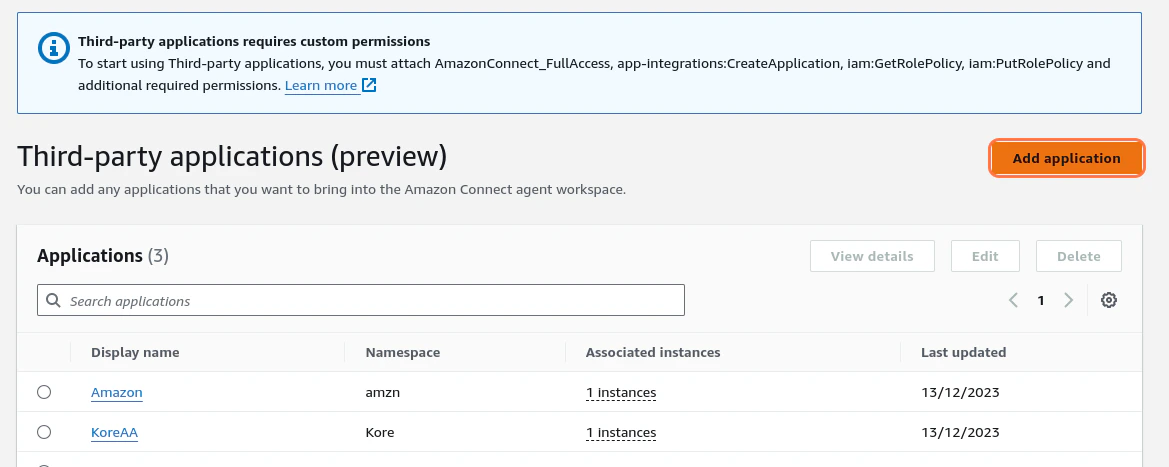 3. Enter a **Display name** for your app - for example, **Kore.ai AgentAssist Application**.
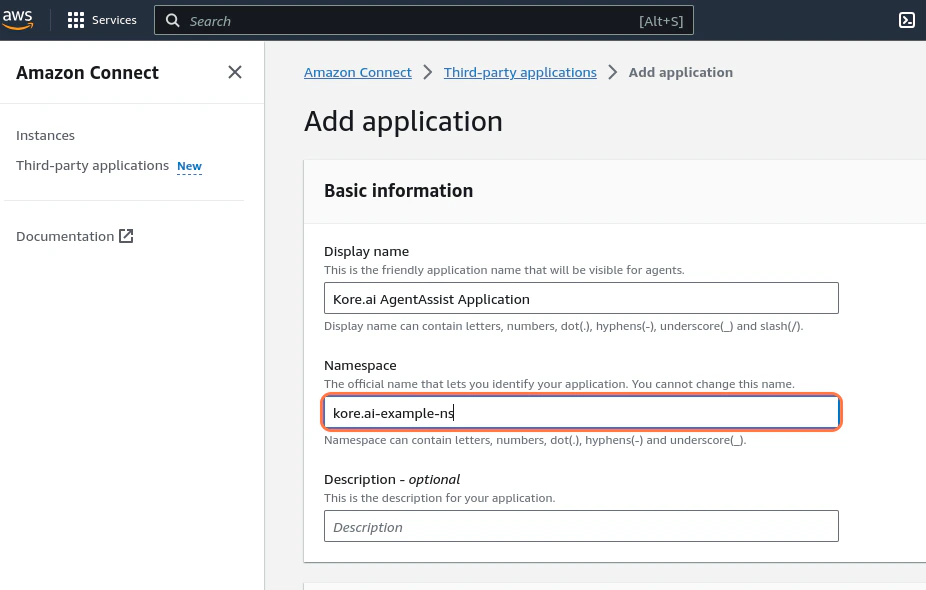
 4. Enter a **Namespace** for the app (for example, **kore.ai-example-ns**).
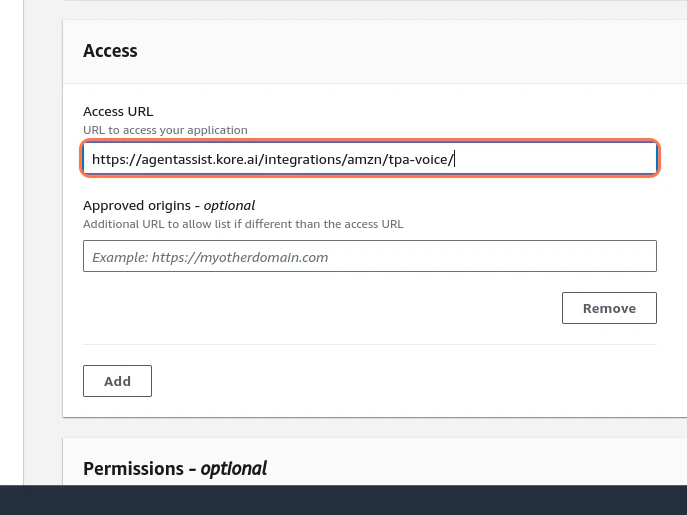
 5. Enter [https://agentassist.kore.ai/integrations/amzn/tpa-voice/](https://agentassist.kore.ai/integrations/amzn/tpa-voice/) in the **Access URL** field.
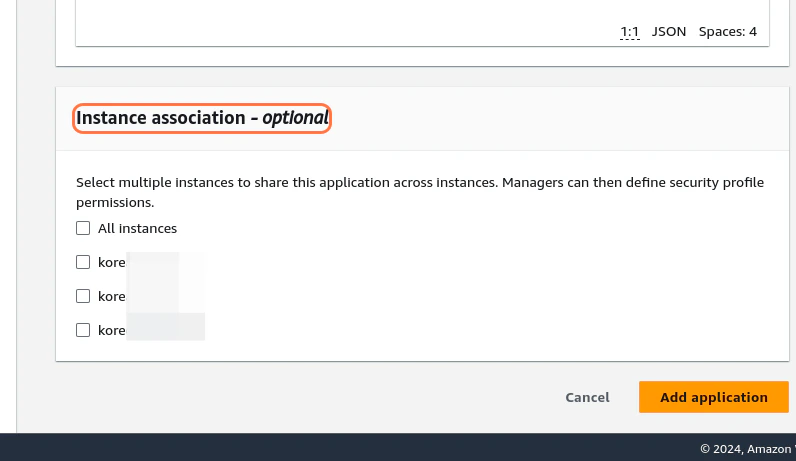
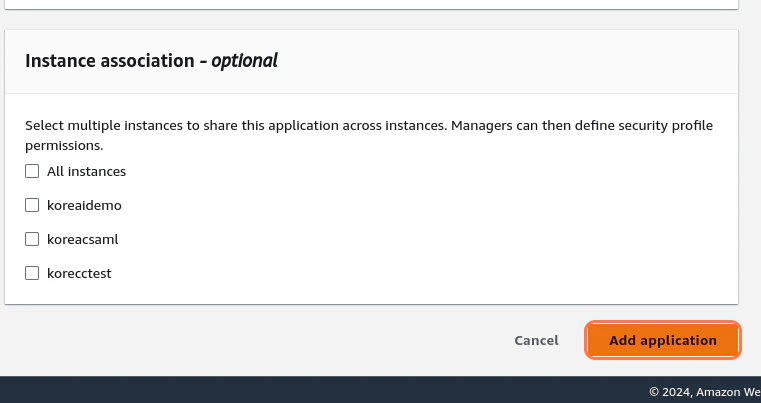
 6. Select all the instances that you want to enable AgentAssist for in the **Instance association - optional** field.
 Third Party Apps are not supported for SAML based Amazon Connect instances. To use Kore Agent AI with SAML based Amazon Connect Instances, refer to [this doc](https://docs.kore.ai/agentassist/integration/amazon-connect-with-agentassist-voice-installation-guide/).
7. Click **Add application**.
Third Party Apps are not supported for SAML based Amazon Connect instances. To use Kore Agent AI with SAML based Amazon Connect Instances, refer to [this doc](https://docs.kore.ai/agentassist/integration/amazon-connect-with-agentassist-voice-installation-guide/).
7. Click **Add application**.
 ## Amazon Connect Security Profile Permissions
To view and use the Agent AI widget in the Amazon Connect Agent workspace, enable the **AgentAssist** application in the agent's security profile. If you don't assign this permission, the widget doesn't load even if the third-party application is created and associated with the Amazon Connect instance.
### Steps to enable the security profile permissions
1. Sign in to **Amazon Connect Admin Console**.
2. Navigate to **Users** > **Security Profiles**.
3. Open the relevant security profile (for example, **Agent** or **Admin**).
4. Scroll to the **Agent applications** section.
5. Ensure the **Agent applications** > **KoreAgentAssist** permission is enabled.
6. Save the security profile.
7. Make sure this security profile is assigned to the agent.
Only the users whose security profile includes **KoreAgentAssist** can see the Agent AI widget in the Agent workspace. This permission must be added **per security profile**, not **per user**.
8. If agents report that the Agent AI widget is not visible, verify the following:
* Correct **assigned security profile**
* **KoreAgentAssist** is enabled under **Agent applications**
* **Agent** or **Admin** roles are assigned, and the required permission is present.
## Amazon Connect
### Configuring Amazon Connect Instance
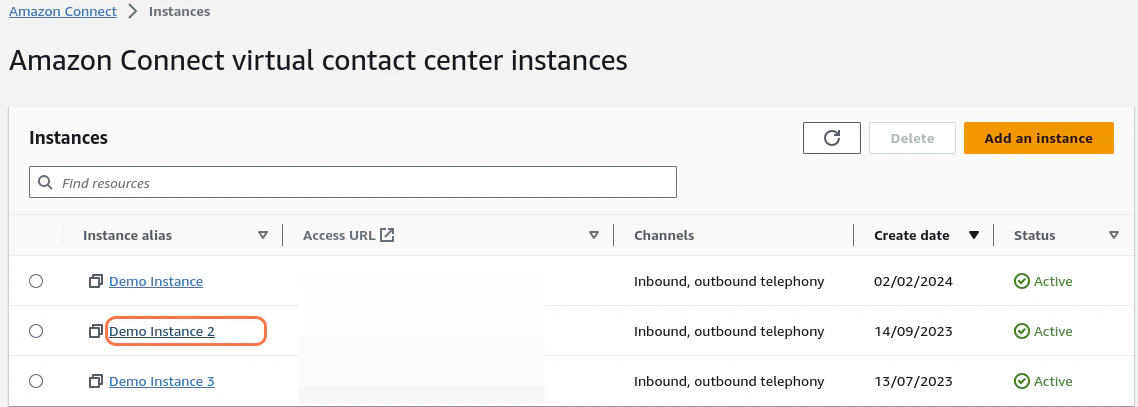
1. Select your **Amazon Connect** instance. (To create a new instance, follow [Create an Amazon Connect instance](https://docs.aws.amazon.com/connect/latest/adminguide/amazon-connect-instances.html).)
## Amazon Connect Security Profile Permissions
To view and use the Agent AI widget in the Amazon Connect Agent workspace, enable the **AgentAssist** application in the agent's security profile. If you don't assign this permission, the widget doesn't load even if the third-party application is created and associated with the Amazon Connect instance.
### Steps to enable the security profile permissions
1. Sign in to **Amazon Connect Admin Console**.
2. Navigate to **Users** > **Security Profiles**.
3. Open the relevant security profile (for example, **Agent** or **Admin**).
4. Scroll to the **Agent applications** section.
5. Ensure the **Agent applications** > **KoreAgentAssist** permission is enabled.
6. Save the security profile.
7. Make sure this security profile is assigned to the agent.
Only the users whose security profile includes **KoreAgentAssist** can see the Agent AI widget in the Agent workspace. This permission must be added **per security profile**, not **per user**.
8. If agents report that the Agent AI widget is not visible, verify the following:
* Correct **assigned security profile**
* **KoreAgentAssist** is enabled under **Agent applications**
* **Agent** or **Admin** roles are assigned, and the required permission is present.
## Amazon Connect
### Configuring Amazon Connect Instance
1. Select your **Amazon Connect** instance. (To create a new instance, follow [Create an Amazon Connect instance](https://docs.aws.amazon.com/connect/latest/adminguide/amazon-connect-instances.html).)
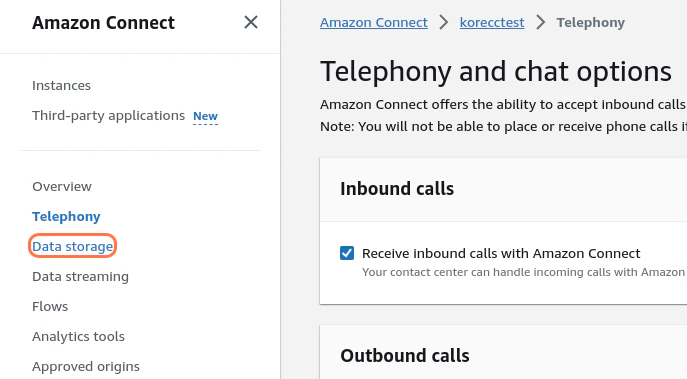
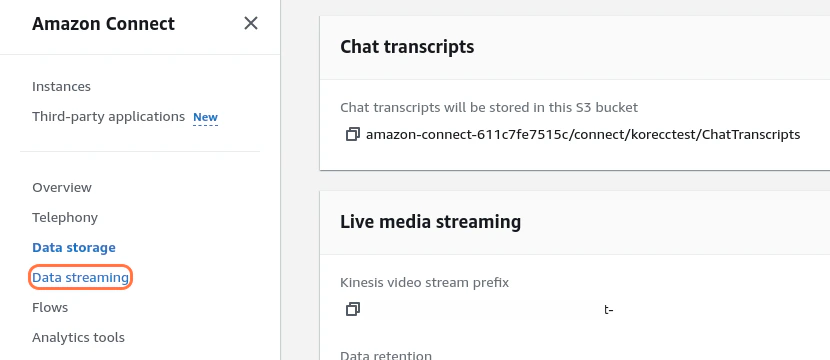
 2. Click **Data storage**.
 3. Click **Edit** next to **Live media streaming**. Here, you must create instances of Kinesis Video Streams.
 4. Add an appropriate **Prefix** for the **Kinesis Video Streams**, and select an **AWS Key Management Service**.
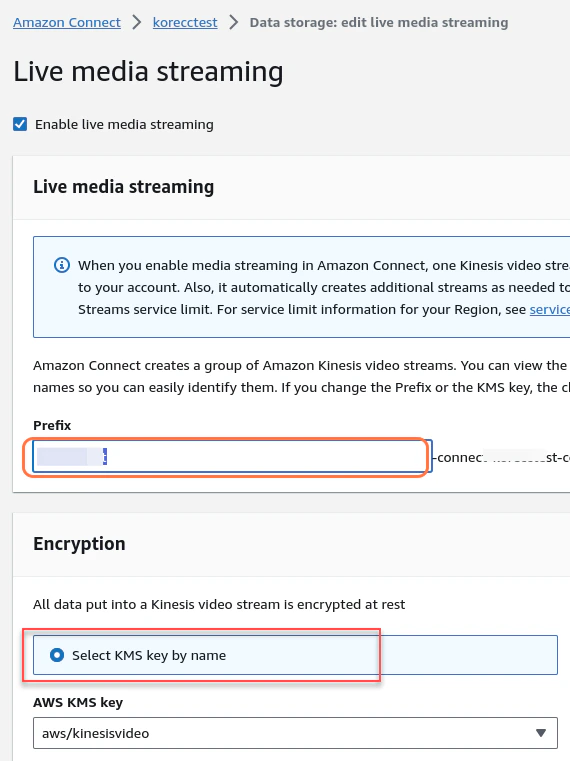 5. Set an appropriate **Data retention period** - 1 hour should be enough for Kore.ai AgentAssist use cases.
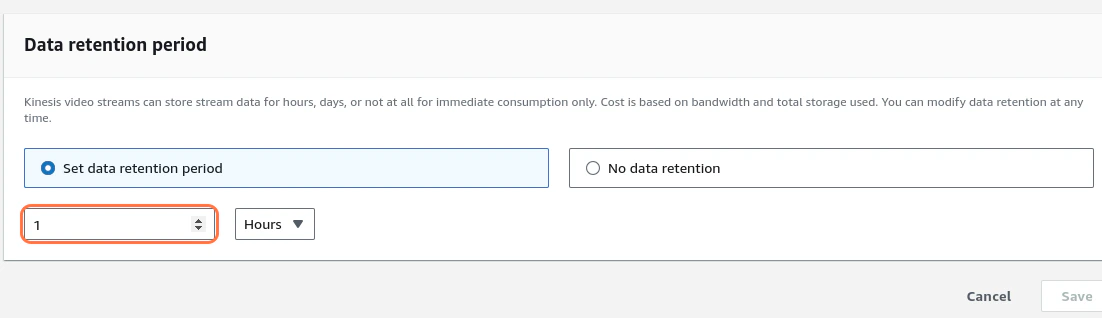 6. Click **Save**.
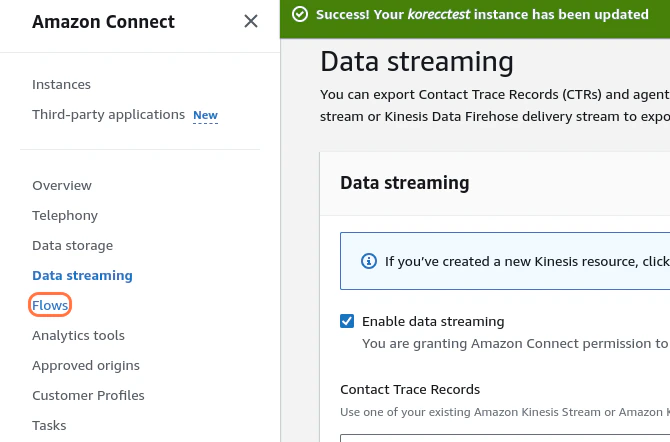
7. Click **Data streaming**.
6. Click **Save**.
7. Click **Data streaming**.
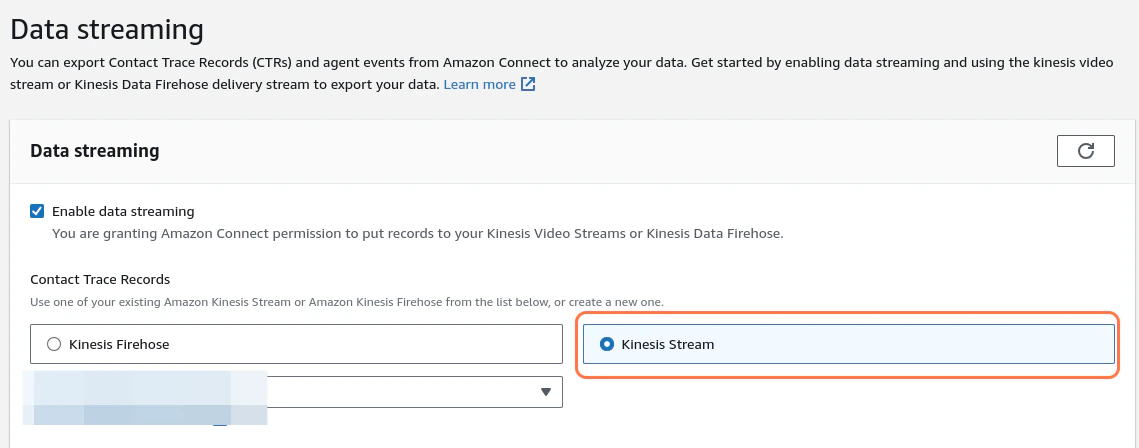
 8. Select the **Enable data streaming** checkbox.
9. Select **Kinesis Stream**.
8. Select the **Enable data streaming** checkbox.
9. Select **Kinesis Stream**.
 10. Click **Create a new Kinesis Stream** for this application, or select an existing one from the dropdown list. You can use the same stream for **Contact Trace Records (CTRs)** and **Agent Events**.
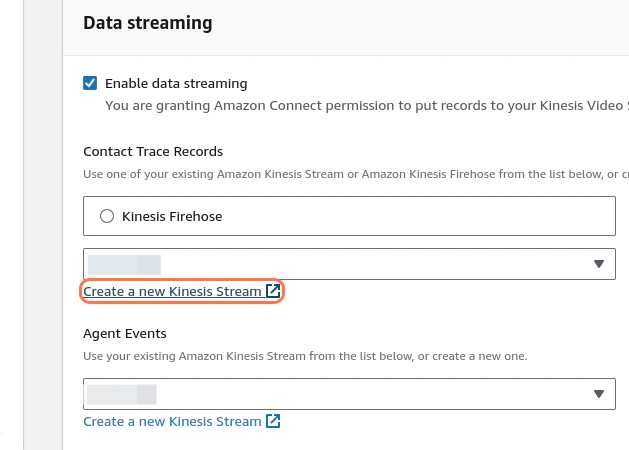 11. Click **Save.**
12. Click **Flows**.
11. Click **Save.**
12. Click **Flows**.
 13. Click **Choose an option** under **AWS Lambda**.
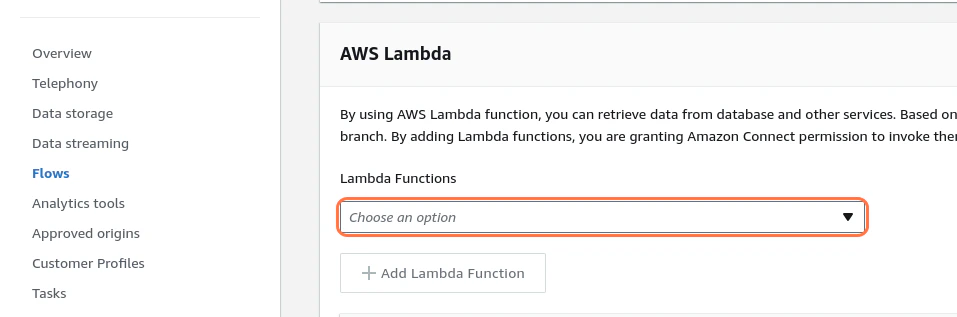 14. Select **KVS Trigger Lambda** from the dropdown list.
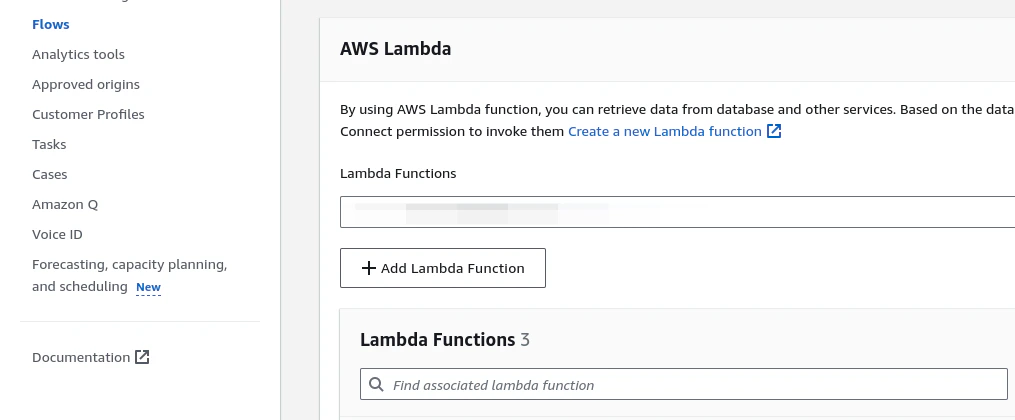 15. Click **Add Lambda Function**.
 16. Follow the above two steps for the IFrame Token Generator Lambda.
### Configuring Amazon Connect Contact Flow
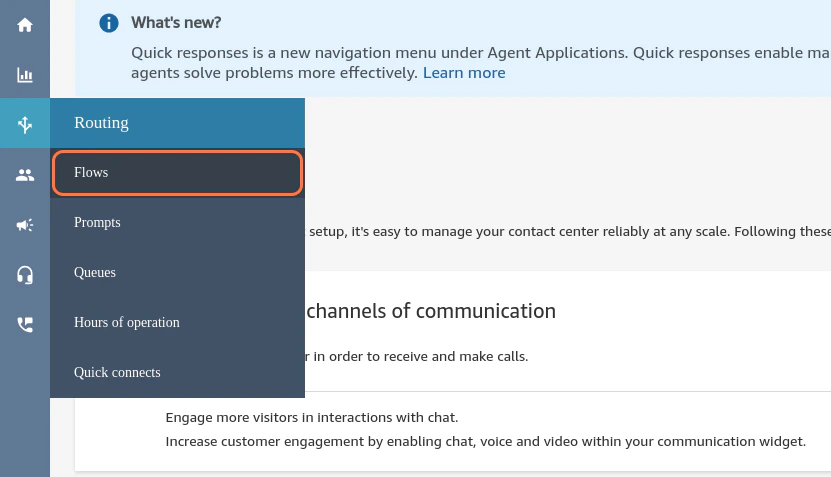
1. Sign in to your **Amazon Connect Instance**.
2. Click **Flows**.
16. Follow the above two steps for the IFrame Token Generator Lambda.
### Configuring Amazon Connect Contact Flow
1. Sign in to your **Amazon Connect Instance**.
2. Click **Flows**.
 3. Click **Create flow**.
 4. Click the **dropdown list** icon.
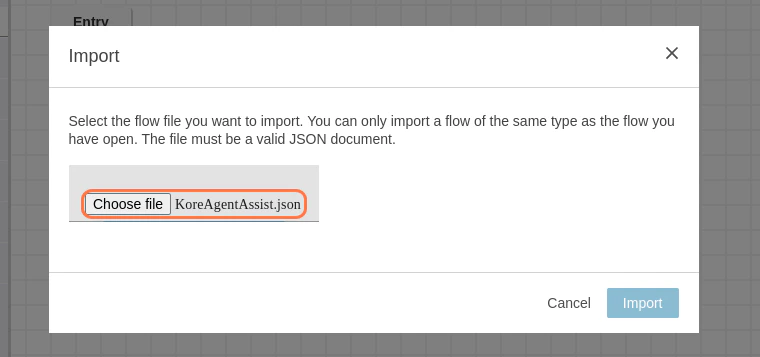
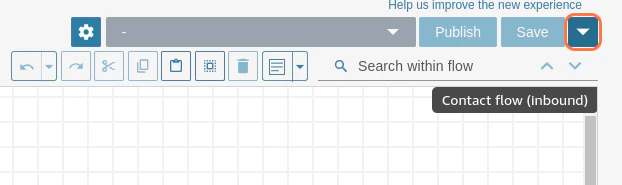 5. Click **Import**.
 6. Select **KoreAgentAssist.json** from the file upload menu. You can download it from [here](https://raw.githubusercontent.com/Koredotcom/korecc-twilio/master/AmazonConnect/flows/voice/KoreAgentAssist.json).
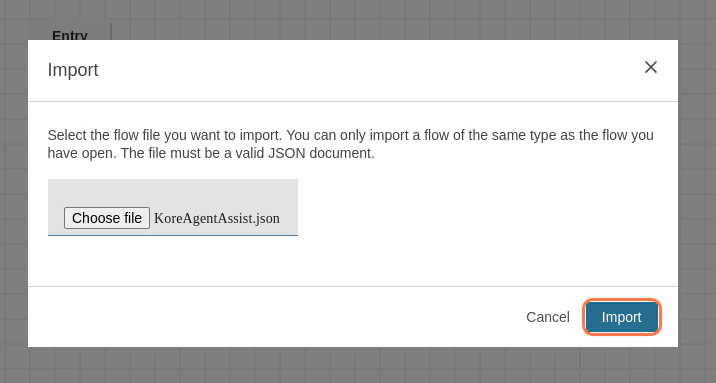
 7. Click **Import**.
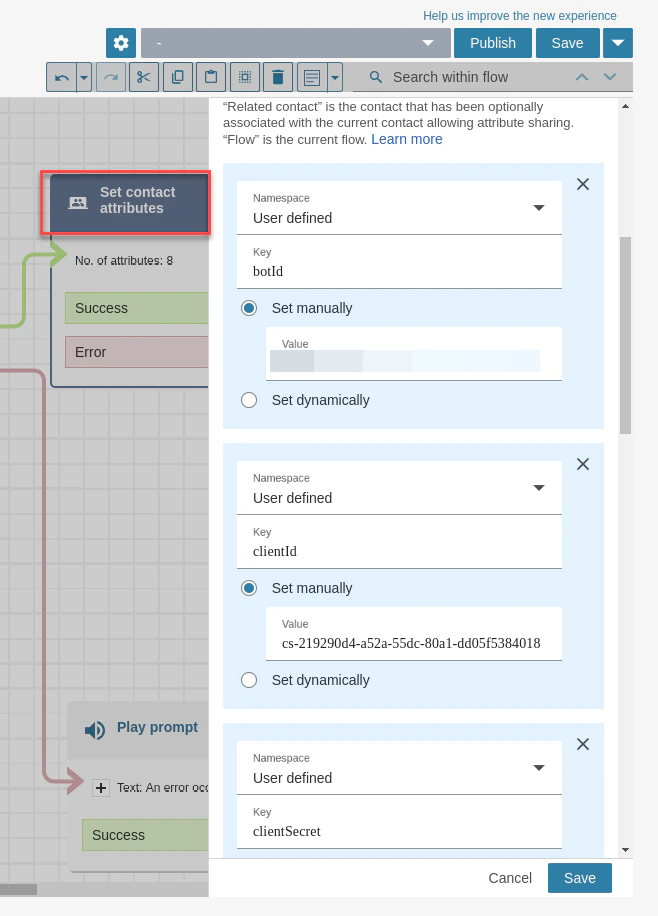
 8. Click **Set contact attributes**, and enter the required fields:
* **BotID**: Add your Agent AI Bot ID created on Kore UXO Platform.
* **ClientId**: Add your Agent AI Client ID created on Kore UXO Platform.
* **ClientSecret**: Add your Agent AI Client Secret created on Kore UXO Platform.
* **Language**: Agent AI loads in English (en) by default. To load the widget in another language, pass the **Language contact** attribute in the contact flow.
* **sipUri**: Add `sip:[XXXX@savg-us-prod-sbc-in-nlb-0d9a4c651955ff47.elb.us-east-1.amazonaws.com](mailto:XXXX@savg-us-prod-sbc-in-nlb-0d9a4c651955ff47.elb.us-east-1.amazonaws.com)` and replace **XXXX** with your SIPREC Configuration of Agent AI.
To get the SIP URI from [Kore](https://platform.kore.ai/):
1. Go to **Agent AI** > **Flows & Channels** > **Voice Gateway**.
2. Click **SIP Numbers** > **Configure SIP Trunk**.
3. Select **Agent AI**, under the **Product Selection** section.
4. Enter \[172.23.12.0/24,172.23.13.0/24] in the **List of IP Address** field, for the US region.
8. Click **Set contact attributes**, and enter the required fields:
* **BotID**: Add your Agent AI Bot ID created on Kore UXO Platform.
* **ClientId**: Add your Agent AI Client ID created on Kore UXO Platform.
* **ClientSecret**: Add your Agent AI Client Secret created on Kore UXO Platform.
* **Language**: Agent AI loads in English (en) by default. To load the widget in another language, pass the **Language contact** attribute in the contact flow.
* **sipUri**: Add `sip:[XXXX@savg-us-prod-sbc-in-nlb-0d9a4c651955ff47.elb.us-east-1.amazonaws.com](mailto:XXXX@savg-us-prod-sbc-in-nlb-0d9a4c651955ff47.elb.us-east-1.amazonaws.com)` and replace **XXXX** with your SIPREC Configuration of Agent AI.
To get the SIP URI from [Kore](https://platform.kore.ai/):
1. Go to **Agent AI** > **Flows & Channels** > **Voice Gateway**.
2. Click **SIP Numbers** > **Configure SIP Trunk**.
3. Select **Agent AI**, under the **Product Selection** section.
4. Enter \[172.23.12.0/24,172.23.13.0/24] in the **List of IP Address** field, for the US region.
 5. Copy the **SIP URI** and paste inside the **contact attributes sipUri** field inside Amazon Connect flow.
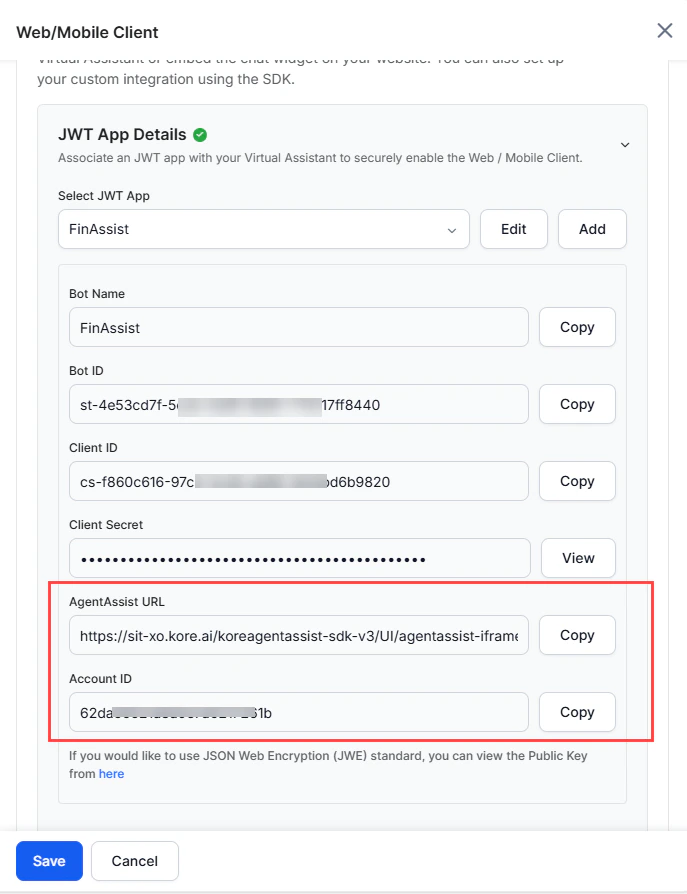
* **agentassistUrl**: Add your **Agent AI URL** created on Kore UXO Platform.
* **accountId**: Add your Agent AI **Account ID** created on Kore UXO Platform.
To get the **agentassistURL** and **accountID** values:
1. Go to **Agent AI** > **Flows & Channels**.
2. Click **Digital** > **Web/Mobile Client**.
3. Click to expand the **JWT App Details** section.
5. Copy the **SIP URI** and paste inside the **contact attributes sipUri** field inside Amazon Connect flow.
* **agentassistUrl**: Add your **Agent AI URL** created on Kore UXO Platform.
* **accountId**: Add your Agent AI **Account ID** created on Kore UXO Platform.
To get the **agentassistURL** and **accountID** values:
1. Go to **Agent AI** > **Flows & Channels**.
2. Click **Digital** > **Web/Mobile Client**.
3. Click to expand the **JWT App Details** section.
 * **wssUrl**: Add **wss\://savg-webserver.kore.ai**
 9. Click **Save**.
10. Click **Start Stream and Transcription in Kore** Lambda.
9. Click **Save**.
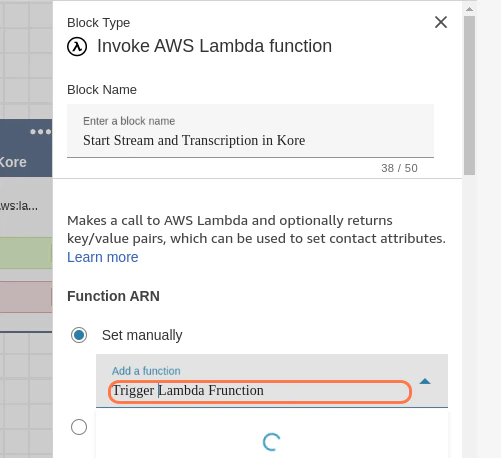
10. Click **Start Stream and Transcription in Kore** Lambda.
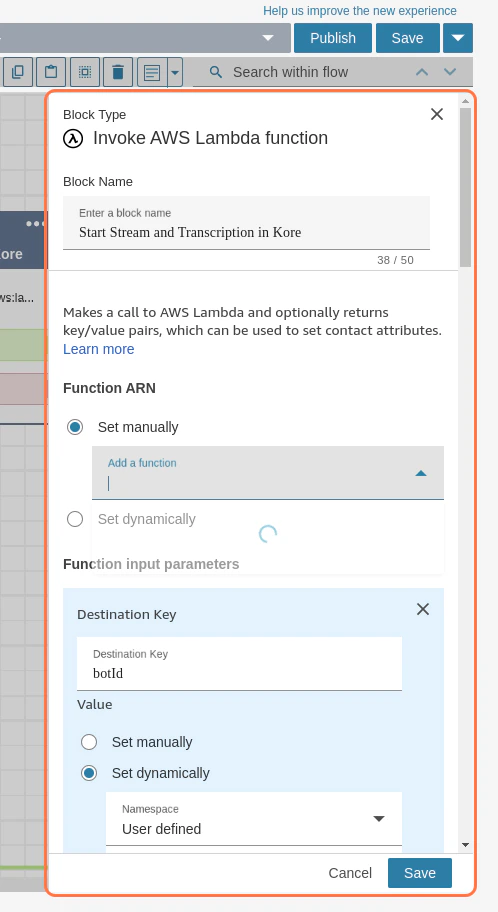 11. Select your **Trigger Lambda Function** from the dropdown list.
12. Click **Save**.
13. Click **Kore Token Generator for TPA** Lambda.
14. Select your **IFrame token generation** Lambda.
11. Select your **Trigger Lambda Function** from the dropdown list.
12. Click **Save**.
13. Click **Kore Token Generator for TPA** Lambda.
14. Select your **IFrame token generation** Lambda.
 15. Click **Save**.
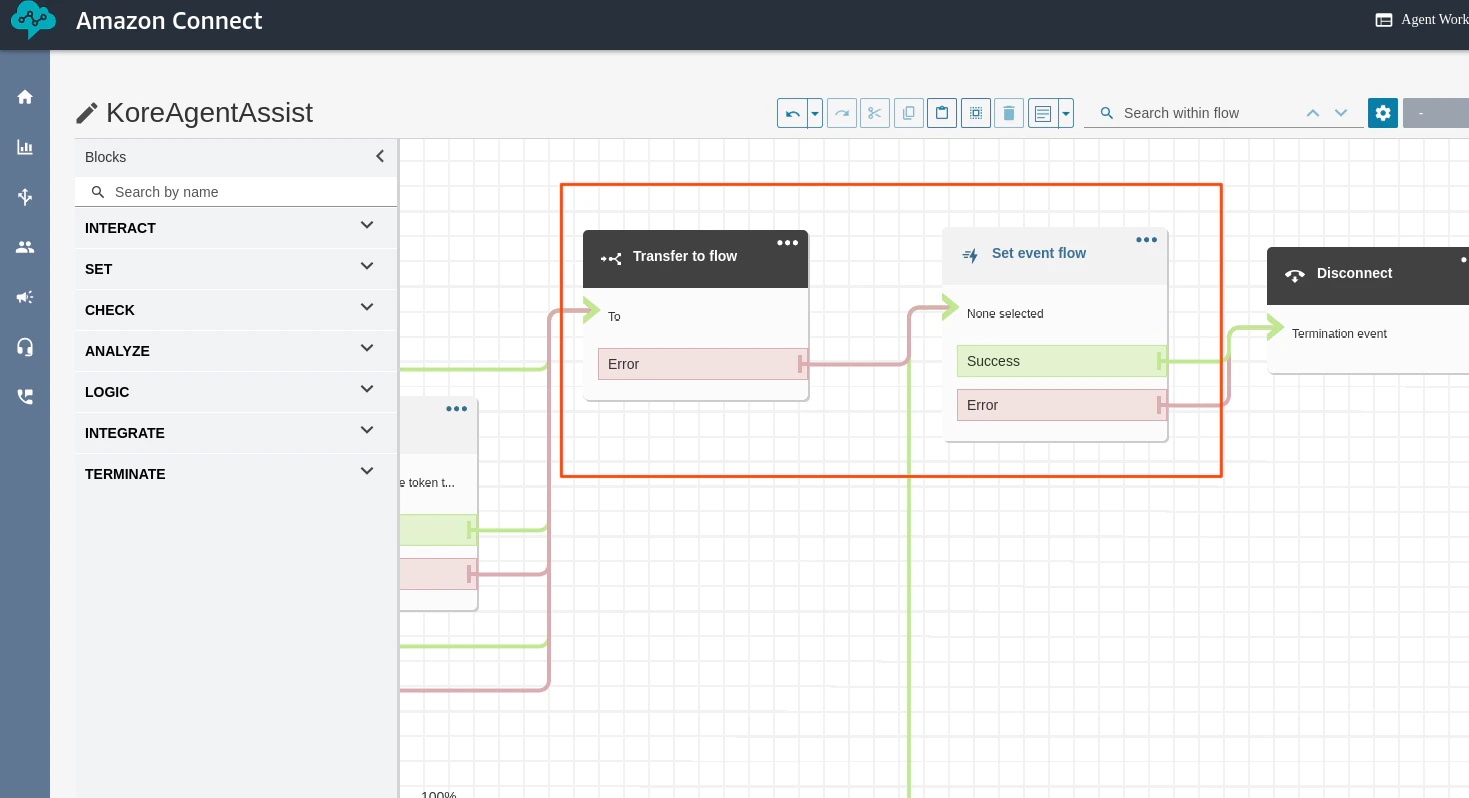
16. For **Transfer to Flow**, select a flow you want to move the user to. For example, save the following JSON in a file, import this flow to **Flows**, and add **Queue** details for routing: [KVSQueueFlow.json](#kvsqueueflowjson).
17. To use agent dispositions, configure the **Set Event Flow** block with **Disconnect flow for Agent UI** hook by importing [this flow](https://raw.githubusercontent.com/Koredotcom/korecc-twilio/master/AmazonConnect/flows/voice/DispositionFlow.json) and selecting it. If not, you can delete the block and connect the remaining blocks to the disconnect block.
The disposition saving logic is at your discretion. Implement as per your use case. Some examples are:
> * Use a Lambda to store it within a document database.
> * Pass the data via a webhook to a third-party CRM.
15. Click **Save**.
16. For **Transfer to Flow**, select a flow you want to move the user to. For example, save the following JSON in a file, import this flow to **Flows**, and add **Queue** details for routing: [KVSQueueFlow.json](#kvsqueueflowjson).
17. To use agent dispositions, configure the **Set Event Flow** block with **Disconnect flow for Agent UI** hook by importing [this flow](https://raw.githubusercontent.com/Koredotcom/korecc-twilio/master/AmazonConnect/flows/voice/DispositionFlow.json) and selecting it. If not, you can delete the block and connect the remaining blocks to the disconnect block.
The disposition saving logic is at your discretion. Implement as per your use case. Some examples are:
> * Use a Lambda to store it within a document database.
> * Pass the data via a webhook to a third-party CRM.
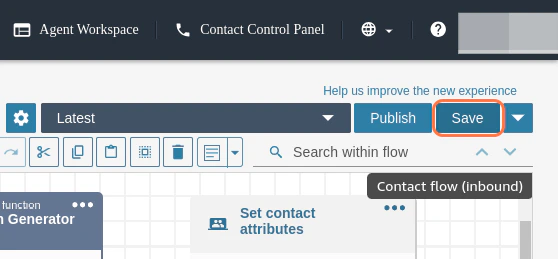
 18. Click **Save**, and publish the flow.
 ### Attaching Contact Flow to Phone Number
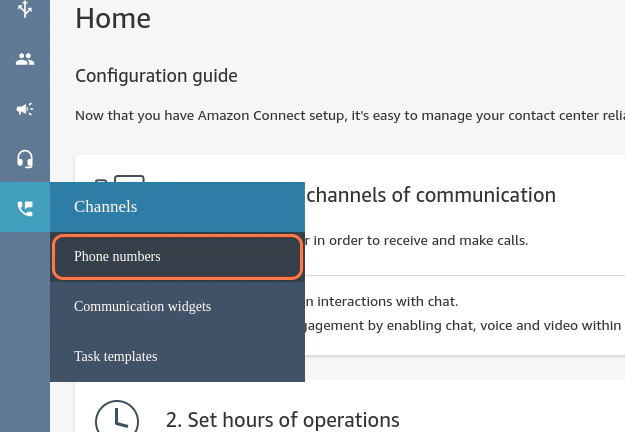
1. Click **Channels** > **Phone numbers**.
### Attaching Contact Flow to Phone Number
1. Click **Channels** > **Phone numbers**.
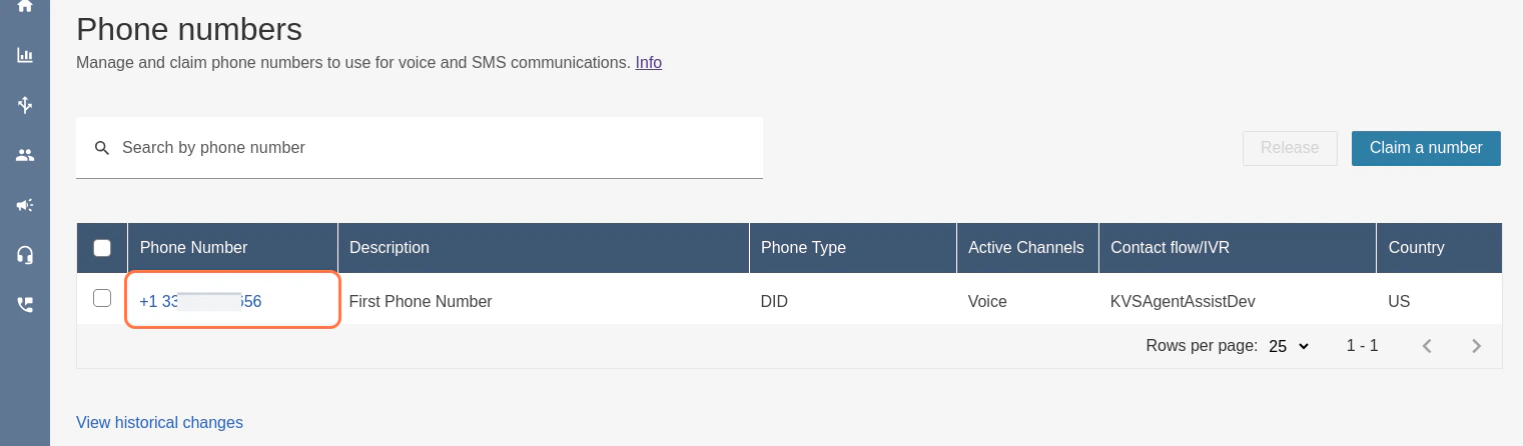
 2. Select the **Phone Number** to attach to the flow. If you don't have a number, go through [How to get an Amazon Connect phone number in your current country](https://docs.aws.amazon.com/connect/latest/adminguide/get-connect-number.html) to claim a phone number.
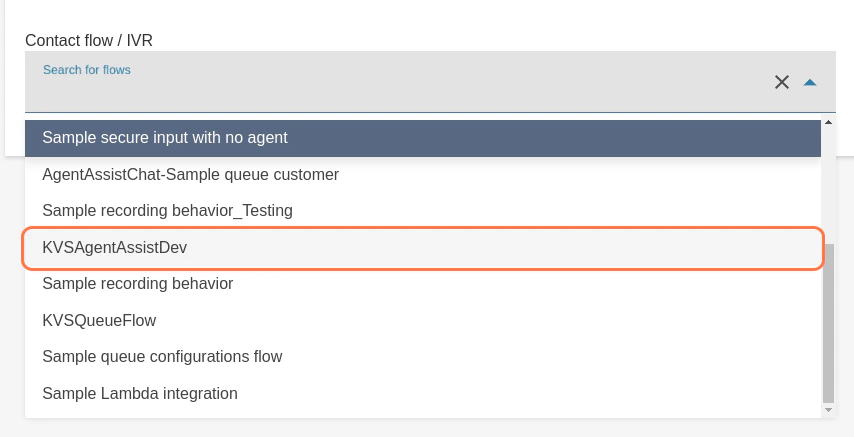
 3. Click the dropdown list to select the **Contact flow**.
 4. Click the **AgentAssist flow** you created.
 5. Click **Save.**
## Test Your Integration
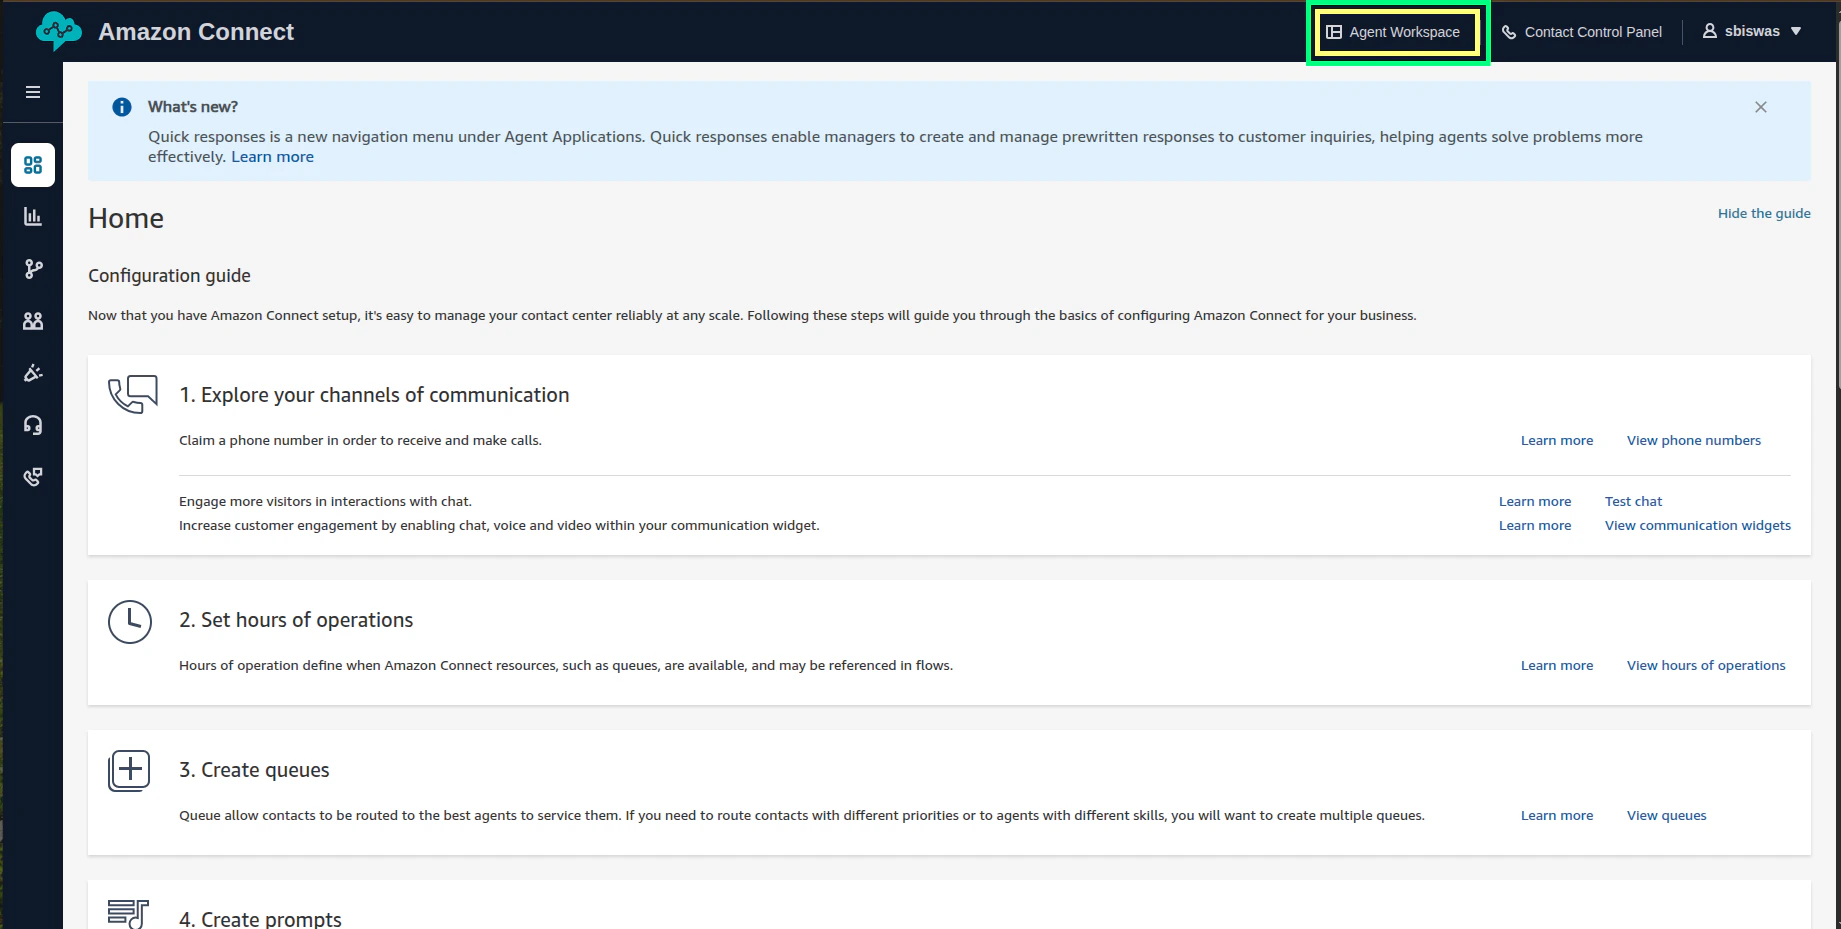
1. Open **Agent Workspace** from the home screen of your **Amazon Connect** instance.
5. Click **Save.**
## Test Your Integration
1. Open **Agent Workspace** from the home screen of your **Amazon Connect** instance.
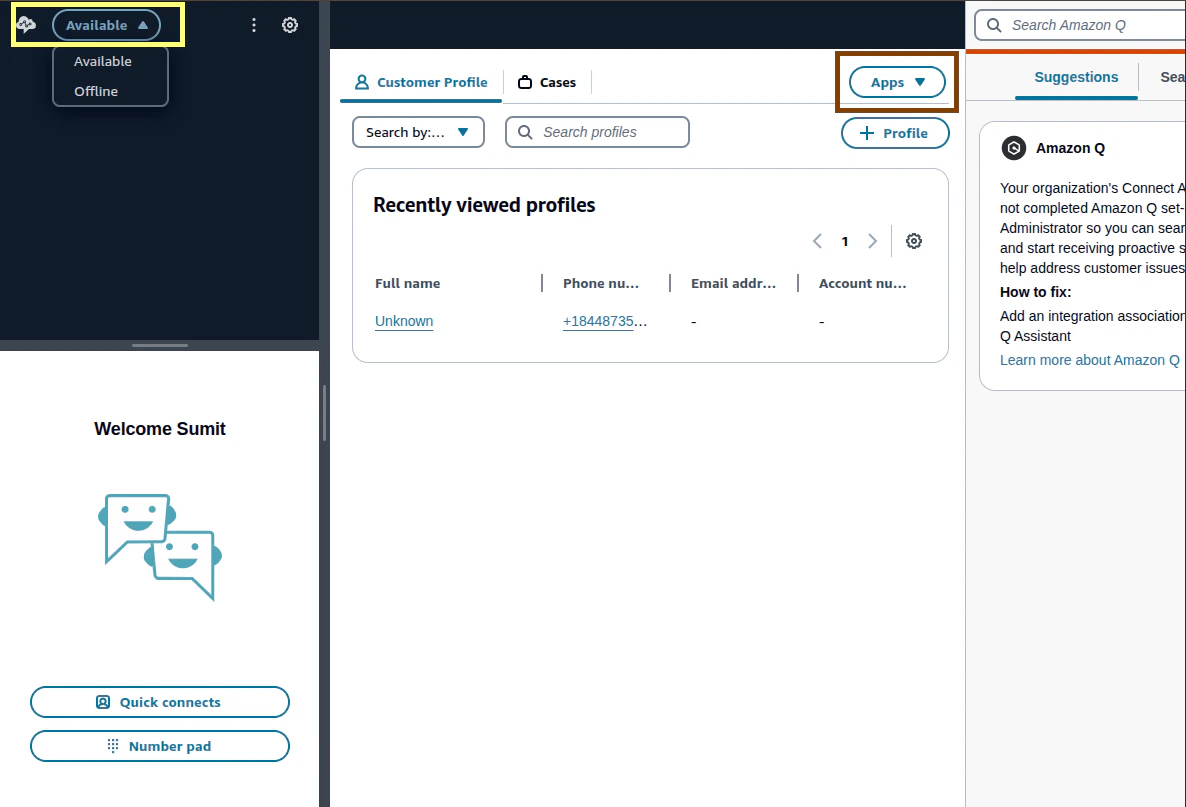
 2. Change the agent status to **Available**. All the third-party applications created in the earlier steps will be visible on the right side under the **Apps** dropdown.
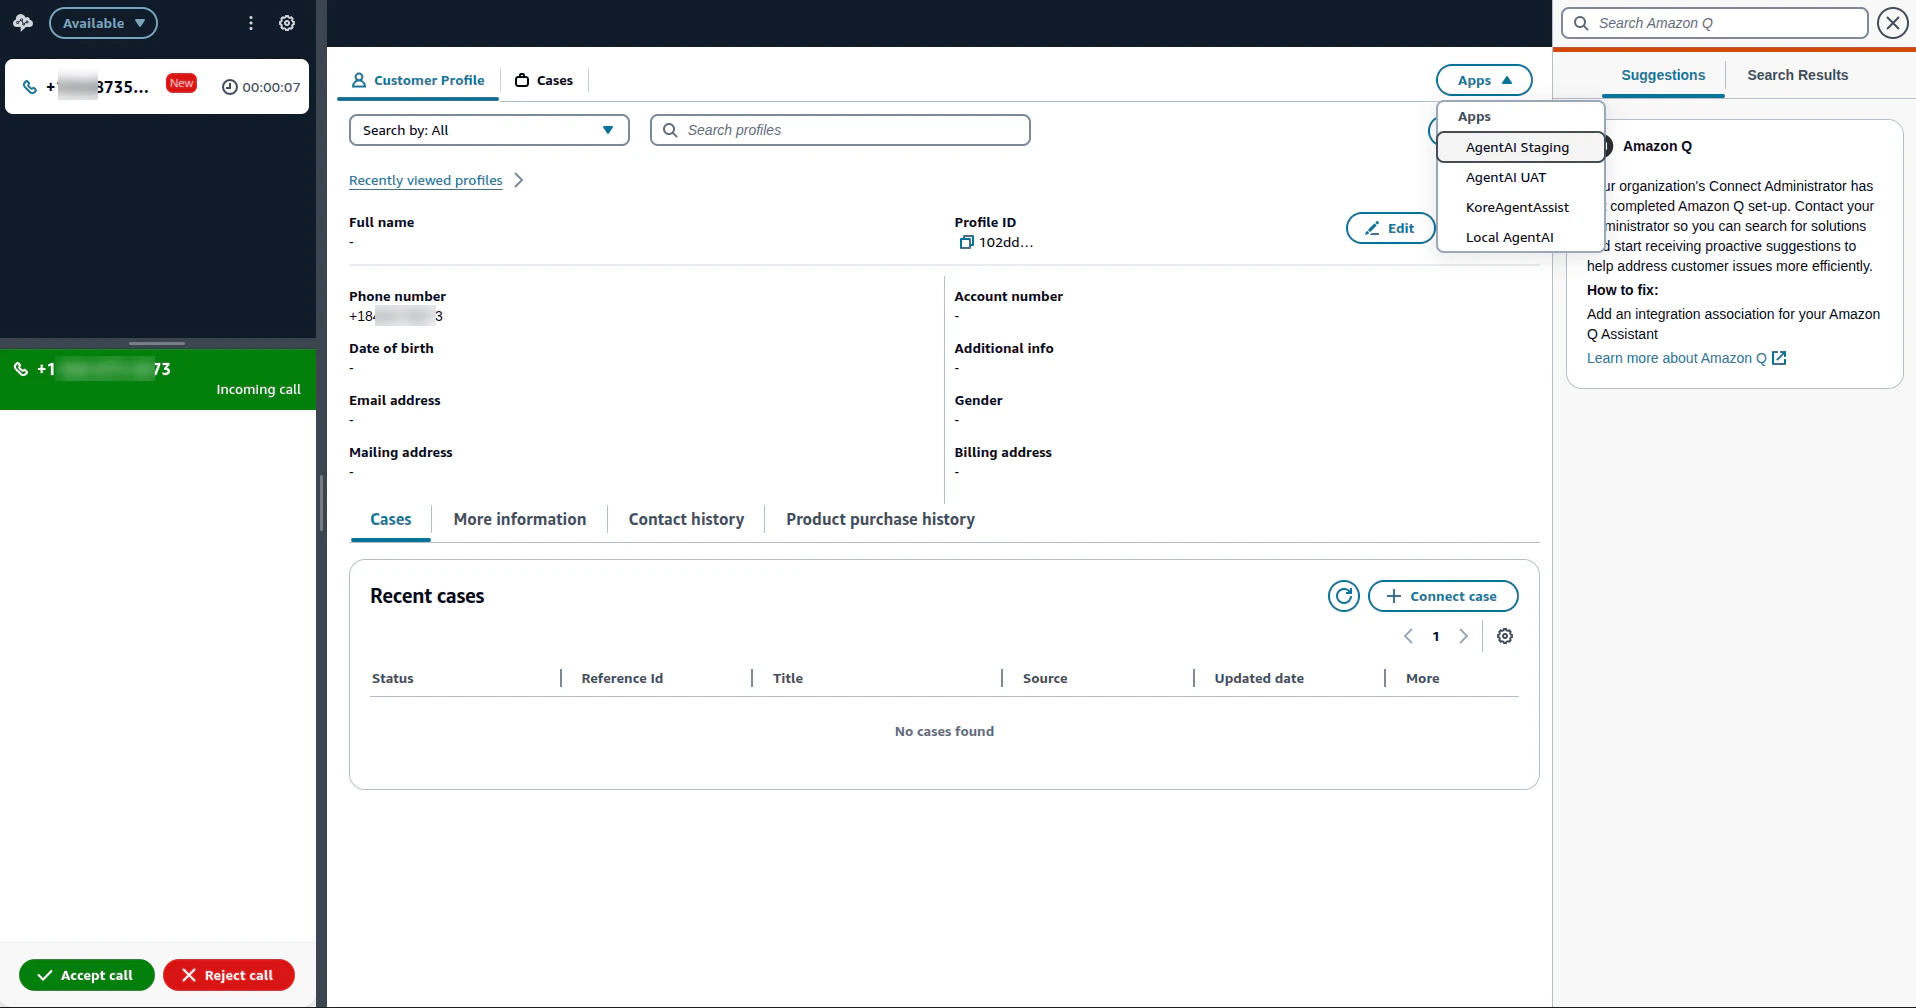
 3. Call the **Amazon Connect** number. Once the incoming call lands into the agent desktop, accept it.
4. Click the **Apps** section, and open the third-party application created earlier.
3. Call the **Amazon Connect** number. Once the incoming call lands into the agent desktop, accept it.
4. Click the **Apps** section, and open the third-party application created earlier.
 * The **Agent AI widget** renders on the right side of the screen.
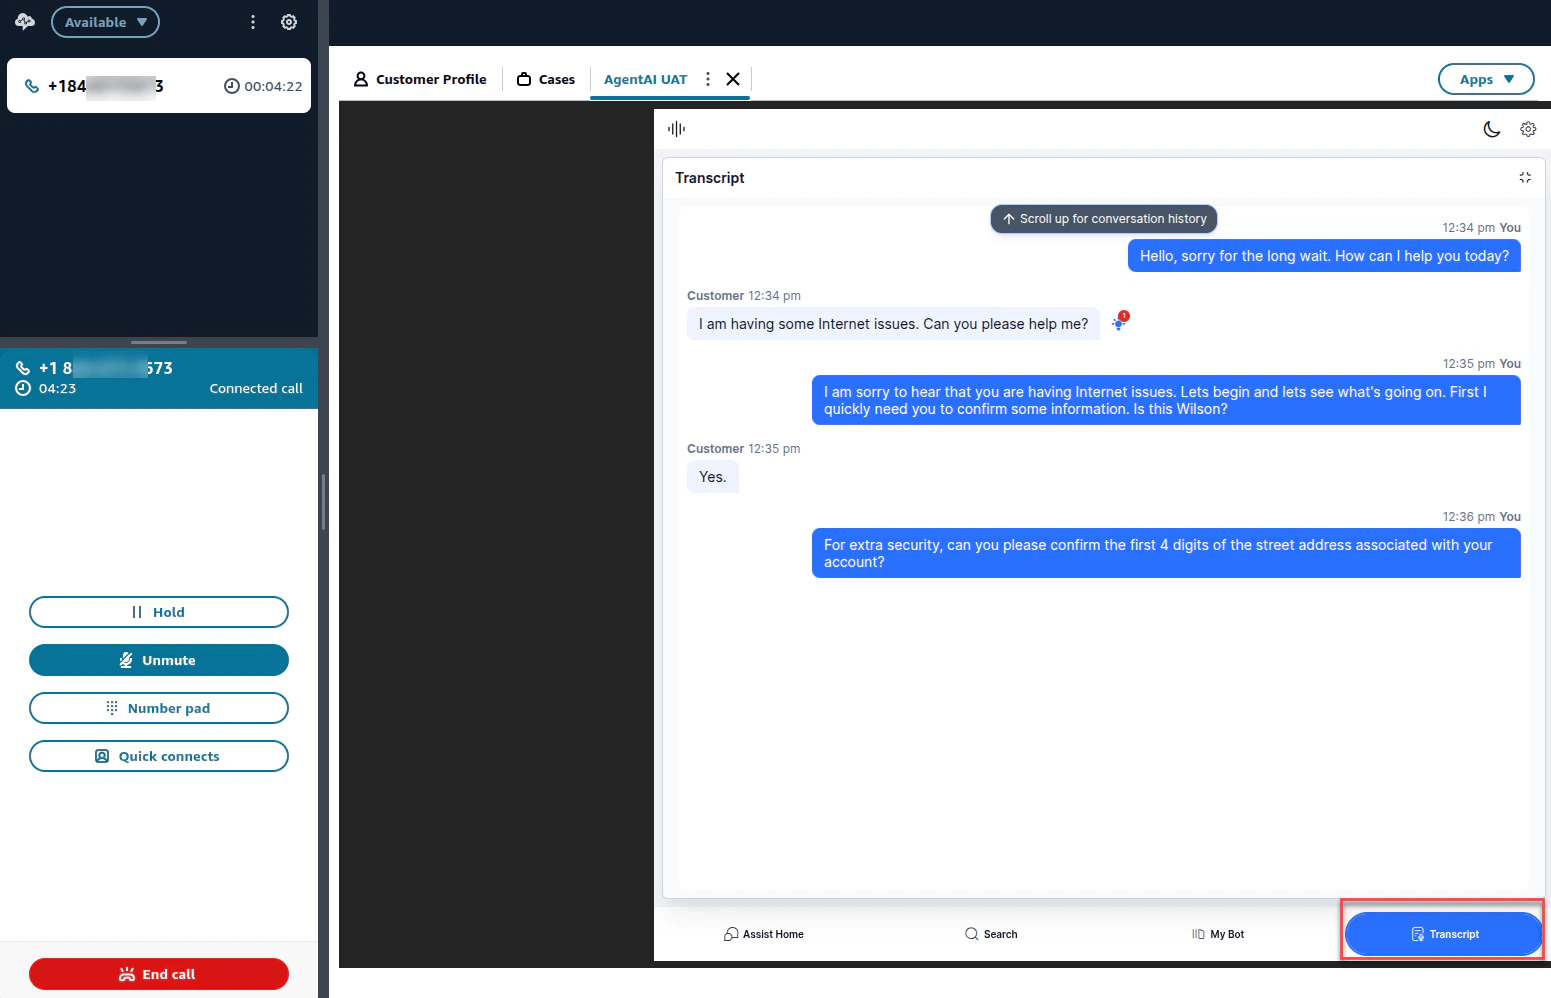
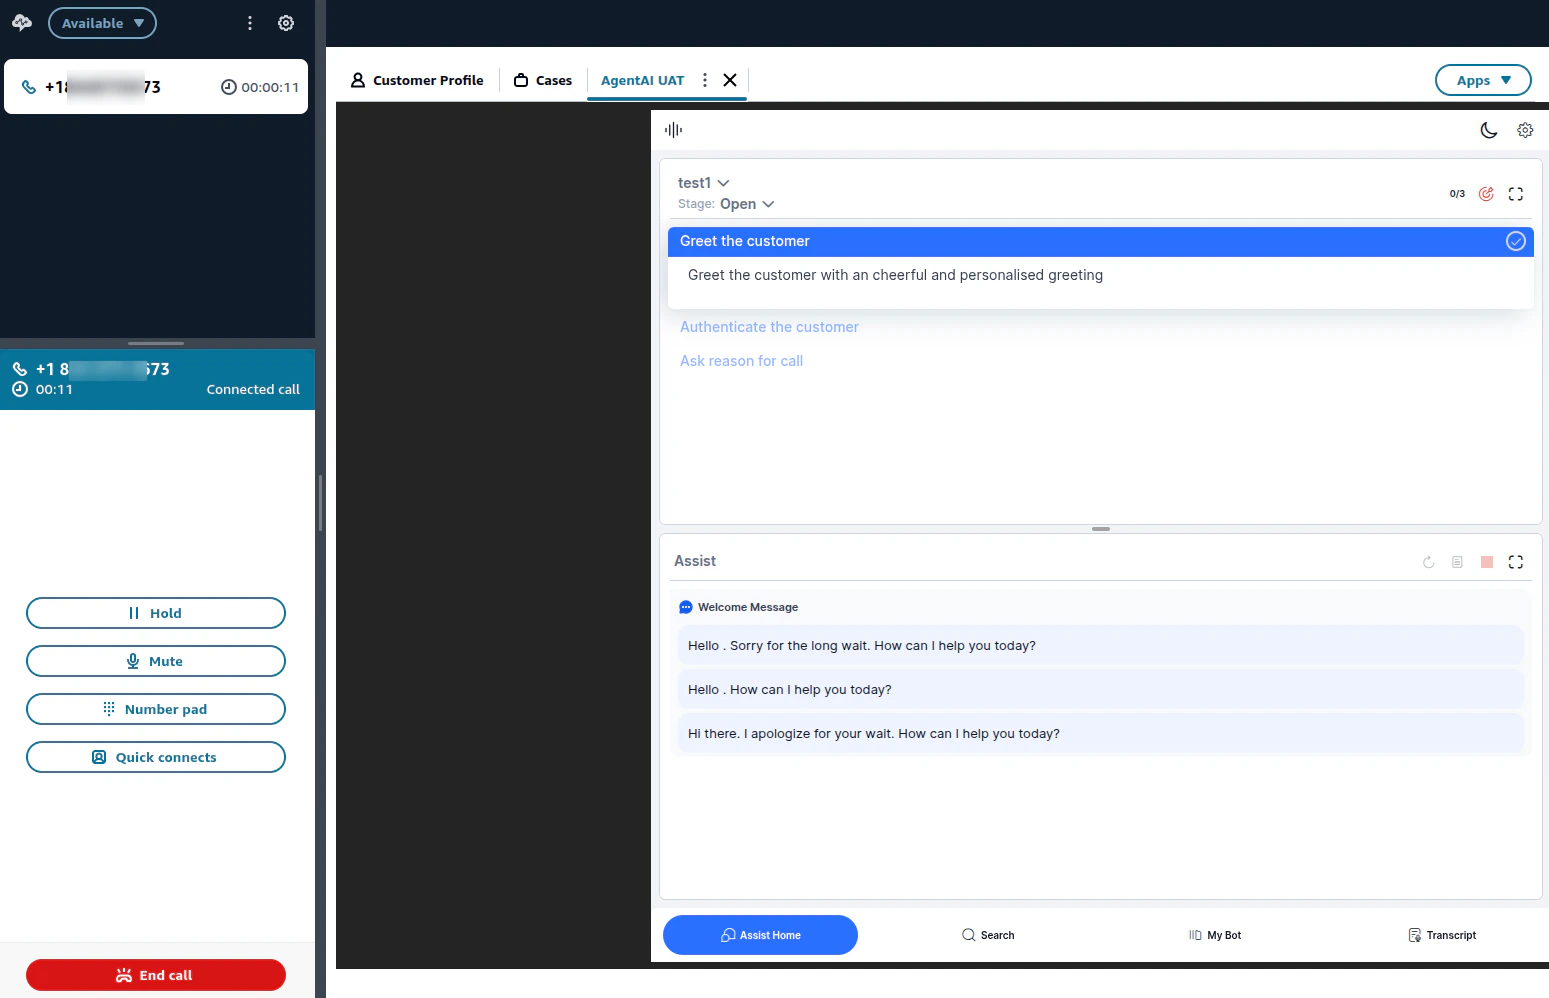 * The Agent AI widget listens to all the user and agent conversation, and the transcript is visible on the **Transcript** tab of the widget.
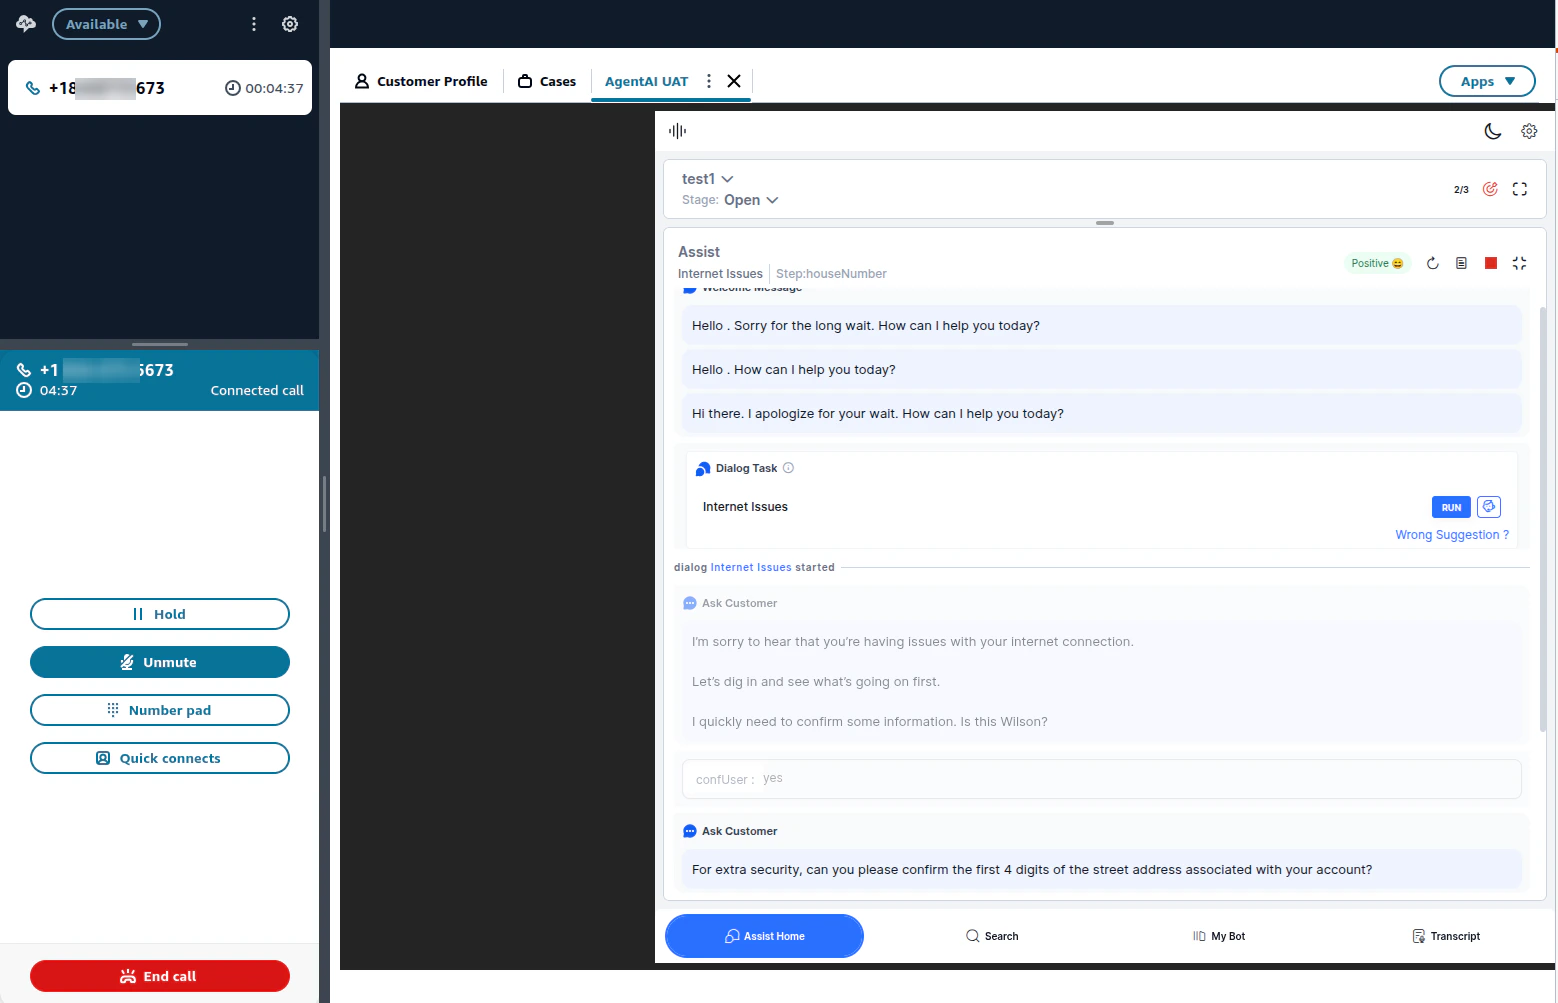
 * Based on the **use case/dialog task** configuration in your Agent AI portal, real-time suggestions appear on the **Assist Home** tab of the widget from the user message in the transcription.
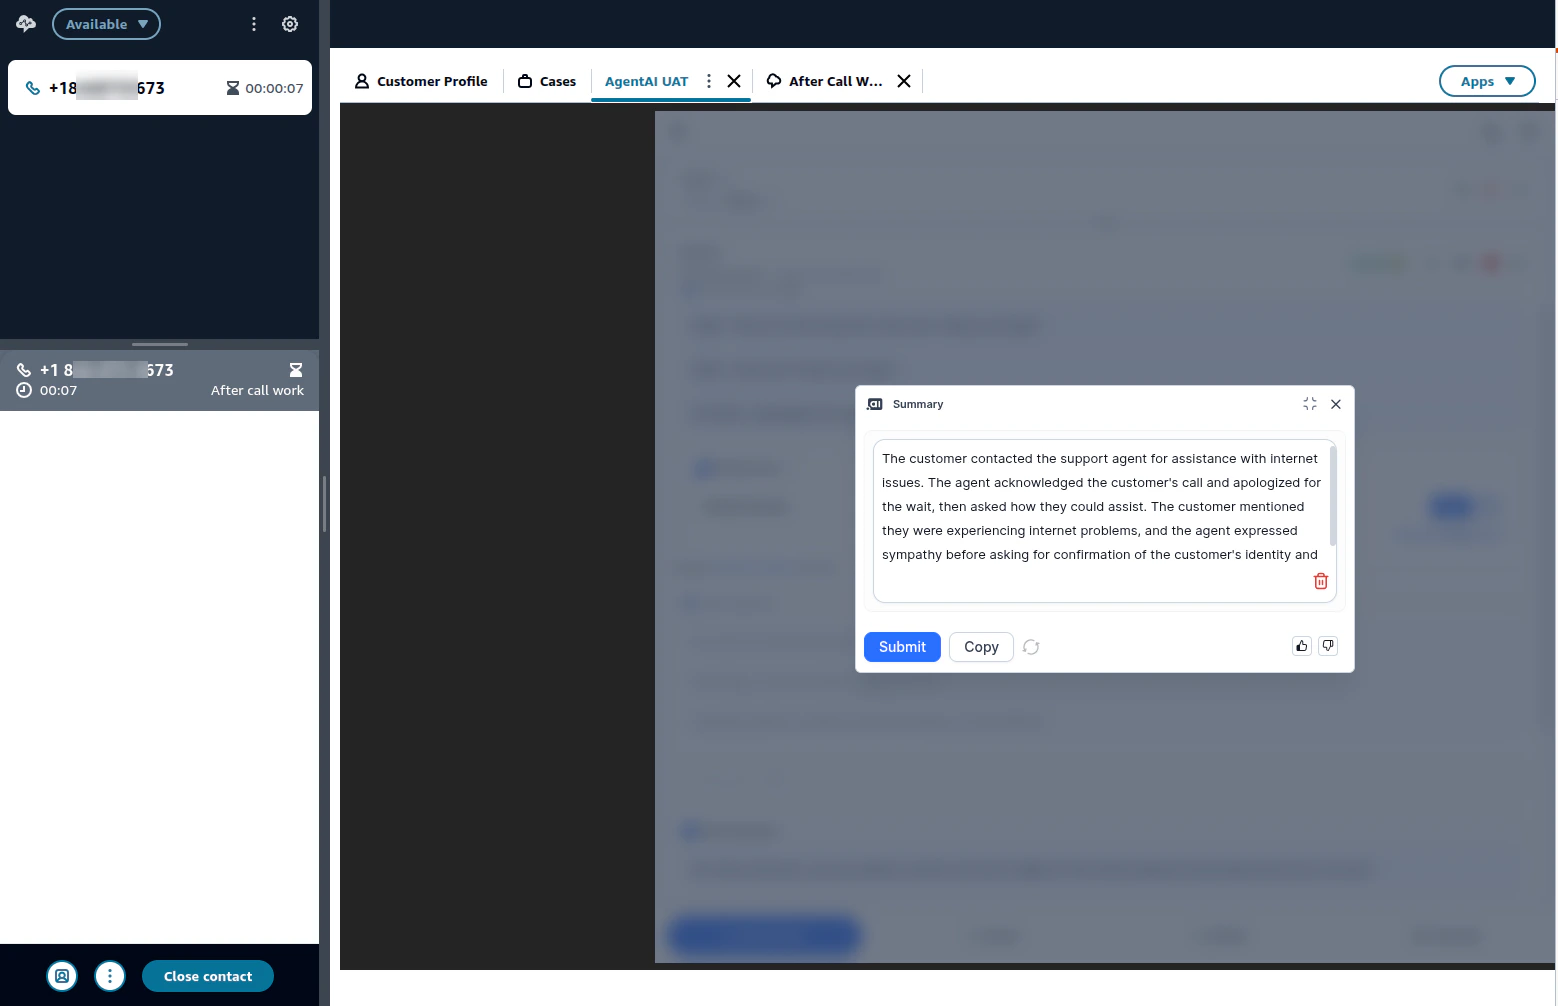
 * Once the call is disconnected, a call summary appears. The agent can modify the summary or copy it to save it into the CRM.
 ## KVSQueueFlow\.json
```
{
"Version": "2019-10-30",
"StartAction": "368dcb0e-e4c5-4301-bad0-6ec9cb4xxxxx",
"Metadata": {
"entryPointPosition": {
"x": 48,
"y": 99
},
"ActionMetadata": {
"f8cb2217-5e95-4ca4-a2d1-1cfdc3exxxxx": {
"position": {
"x": 1186,
"y": 287
}
},
"06ffce3e-77e0-42c7-b872-8fa73b8xxxxx": {
"position": {
"x": 910,
"y": 96
}
},
"368dcb0e-e4c5-4301-bad0-6ec9cb4xxxxx": {
"position": {
"x": 186,
"y": 93
},
"parameters": {
"QueueId": {
"displayName": "BasicQueue"
}
},
"queue": {
"text": "BasicQueue"
}
},
"6992aaaf-4140-4f3f-beb5-a638d7fxxxxx": {
"position": {
"x": 520,
"y": 79
},
"parameters": {
"EventHooks": {
"DisconnectAgentUI": {
"displayName": "Disposition Flow"
}
}
}
}
},
"Annotations": [],
"name": "KVSQueueFlow",
"description": "",
"type": "contactFlow",
"status": "published",
"hash": {}
},
"Actions": [
{
"Parameters": {},
"Identifier": "f8cb2217-5e95-4ca4-a2d1-xxxxx3e02dce",
"Type": "DisconnectParticipant",
"Transitions": {}
},
{
"Parameters": {},
"Identifier": "06ffce3e-77e0-42c7-b872-8fa73b8xxxxx",
"Type": "TransferContactToQueue",
"Transitions": {
"NextAction": "f8cb2217-5e95-4ca4-a2d1-1cfdc3exxxxx",
"Errors": [
{
"NextAction": "f8cb2217-5e95-4ca4-a2d1-1cfdc3exxxxx",
"ErrorType": "QueueAtCapacity"
},
{
"NextAction": "f8cb2217-5e95-4ca4-a2d1-1cfdc3exxxxx",
"ErrorType": "NoMatchingError"
}
]
}
},
{
"Parameters": {
"QueueId": "arn:aws:connect:us-east-1:2748635xxxxx:instance/97c94b3a-7d46-4680-b2ee-ae23086xxxxx/queue/e7c6d05e-b7f2-43d6-abe9-aa861e2xxxxx"
},
"Identifier": "368dcb0e-e4c5-4301-bad0-6ec9cb4xxxxx",
"Type": "UpdateContactTargetQueue",
"Transitions": {
"NextAction": "6992aaaf-4140-4f3f-beb5-a638d7fxxxxx",
"Errors": [
{
"NextAction": "6992aaaf-4140-4f3f-beb5-a638d7fxxxxx",
"ErrorType": "NoMatchingError"
}
]
}
},
{
"Parameters": {
"EventHooks": {
"DisconnectAgentUI": "arn:aws:connect:us-east-1:2748635xxxxx:instance/97c94b3a-7d46-4680-b2ee-ae23086xxxxx/contact-flow/2649a757-5612-4e81-8794-56c760bxxxxx"
}
},
"Identifier": "6992aaaf-4140-4f3f-beb5-a638d7fxxxxx",
"Type": "UpdateContactEventHooks",
"Transitions": {
"NextAction": "06ffce3e-77e0-42c7-b872-8fa73b8xxxxx",
"Errors": [
{
"NextAction": "f8cb2217-5e95-4ca4-a2d1-1cfdc3exxxxx",
"ErrorType": "NoMatchingError"
}
]
}
}
]
}
```
Built with [Mintlify](https://mintlify.com).
## KVSQueueFlow\.json
```
{
"Version": "2019-10-30",
"StartAction": "368dcb0e-e4c5-4301-bad0-6ec9cb4xxxxx",
"Metadata": {
"entryPointPosition": {
"x": 48,
"y": 99
},
"ActionMetadata": {
"f8cb2217-5e95-4ca4-a2d1-1cfdc3exxxxx": {
"position": {
"x": 1186,
"y": 287
}
},
"06ffce3e-77e0-42c7-b872-8fa73b8xxxxx": {
"position": {
"x": 910,
"y": 96
}
},
"368dcb0e-e4c5-4301-bad0-6ec9cb4xxxxx": {
"position": {
"x": 186,
"y": 93
},
"parameters": {
"QueueId": {
"displayName": "BasicQueue"
}
},
"queue": {
"text": "BasicQueue"
}
},
"6992aaaf-4140-4f3f-beb5-a638d7fxxxxx": {
"position": {
"x": 520,
"y": 79
},
"parameters": {
"EventHooks": {
"DisconnectAgentUI": {
"displayName": "Disposition Flow"
}
}
}
}
},
"Annotations": [],
"name": "KVSQueueFlow",
"description": "",
"type": "contactFlow",
"status": "published",
"hash": {}
},
"Actions": [
{
"Parameters": {},
"Identifier": "f8cb2217-5e95-4ca4-a2d1-xxxxx3e02dce",
"Type": "DisconnectParticipant",
"Transitions": {}
},
{
"Parameters": {},
"Identifier": "06ffce3e-77e0-42c7-b872-8fa73b8xxxxx",
"Type": "TransferContactToQueue",
"Transitions": {
"NextAction": "f8cb2217-5e95-4ca4-a2d1-1cfdc3exxxxx",
"Errors": [
{
"NextAction": "f8cb2217-5e95-4ca4-a2d1-1cfdc3exxxxx",
"ErrorType": "QueueAtCapacity"
},
{
"NextAction": "f8cb2217-5e95-4ca4-a2d1-1cfdc3exxxxx",
"ErrorType": "NoMatchingError"
}
]
}
},
{
"Parameters": {
"QueueId": "arn:aws:connect:us-east-1:2748635xxxxx:instance/97c94b3a-7d46-4680-b2ee-ae23086xxxxx/queue/e7c6d05e-b7f2-43d6-abe9-aa861e2xxxxx"
},
"Identifier": "368dcb0e-e4c5-4301-bad0-6ec9cb4xxxxx",
"Type": "UpdateContactTargetQueue",
"Transitions": {
"NextAction": "6992aaaf-4140-4f3f-beb5-a638d7fxxxxx",
"Errors": [
{
"NextAction": "6992aaaf-4140-4f3f-beb5-a638d7fxxxxx",
"ErrorType": "NoMatchingError"
}
]
}
},
{
"Parameters": {
"EventHooks": {
"DisconnectAgentUI": "arn:aws:connect:us-east-1:2748635xxxxx:instance/97c94b3a-7d46-4680-b2ee-ae23086xxxxx/contact-flow/2649a757-5612-4e81-8794-56c760bxxxxx"
}
},
"Identifier": "6992aaaf-4140-4f3f-beb5-a638d7fxxxxx",
"Type": "UpdateContactEventHooks",
"Transitions": {
"NextAction": "06ffce3e-77e0-42c7-b872-8fa73b8xxxxx",
"Errors": [
{
"NextAction": "f8cb2217-5e95-4ca4-a2d1-1cfdc3exxxxx",
"ErrorType": "NoMatchingError"
}
]
}
}
]
}
```
Built with [Mintlify](https://mintlify.com).